Quantcast
Channel: gun – The Survival Place Blog
Viewing all 38 articles
Browse latest View live

Sig Sauer 516 Review

$
0
0

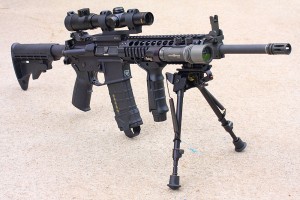
Posted by Prepper Ideas at http://www.prepperideas.com/sig-sauer-516-review/

I just purchased a new Sig Sauer 516 Patrol. The rifle was $1425 out the door at Shoot Straight in Clearwater Florida, though they are currently on sale for about $100 less. If you are local to them, be advised that Pinellas county has a 3 day wait on purchase of any weapon, including long rifles and shotguns. The last AR platform I had was a Delton E316 that I purchased a few months ago and have since sold and I’m not sorry to see it go. The Delton was $841 out the door at a local place. As the Delton was my other latest AR purchase, that’s what I’m comparing the Sig to.

The Delton was an Echo316 Model

www.prepperideas.com echo316

The Sig is a bit pricier than the Delton was (by about $500), but also comes out of the box somewhat accessorized with many popular items that you’ll likely pick up anyway. All in all the Delton was stock rifle in the way of furniture and accessories. Standard M4 furniture, flattop. The Delton was a pain in the ass. It was almost impossible to put a full mag through and not have a misfeed of some kind. I cleaned the rifle thoroughly and tried many different kinds of ammo to see if that may have been the issue, but always no more than about 15-20 rounds before there was an ejection issue, feed issue, even what possibly was an extractor issue, but I’m pretty sure the biggest problem is what felt like a soft recoil spring in the butt of the rifle. Just felt sloppy when it cycled. And overall the rifle was sloppy itself. Lots of rattles that shouldn’t have been on a brand new rifle. I did purchase a standard a2 carrying handle rear sight for this, and nothing else. Because of the reliability issues of the weapon, I didn’t want to start accessorizing it.

I had the Delton for about 4 months, ran around 400 rounds through it at the local range using both a steel mag and a fresh Magpul mag and maybe had 2 full magazines that the weapon fired with no issues. I ended up selling it to a local gun shop and was happy to see that p.o.s. go. Whoever gets that one…you have my condolences.

The Sig

I started looking around for another rifle and a friend of mine showed me this Sig PR video

And after looking around, I came across a few more like this.

In the vids the Sig gets run through the ringer. The video looks legitimate to me, and after getting bit in the ass with the Delton, I went off to do more research. The Internet is ripe with forums of everyday users, LEOs and military service that will pretty much tell you straight from the hip about a weapon and I have only found one guy that had a bitch with his 516 and it turned out to be operator error

At first look out of the box, the Sig 516 is a pretty solid rifle. The quality of fit and finish of the rifle is very good. It feels like a solid weapon, no unusual rattling noises, everything feels tight.

At this point I’ve put only 40 rounds through the Sig and sighted in the optics, this is very much an early “out of the box” review and I really only have a small list of minor gripes about the weapon that don’t have anything to do with hardware.

www.prepperideas.com foam box sig

My first gripe is that this is an expensive rifle and it comes in a styrofoam lined cardboard box. When I purchased the DelTon rifle for about half the price of the Sig, it came in a generic foam lined hard case. It wasn’t a particularly fancy hard case, but it did the job just fine and was a hell of a lot better than a cardboard box. Surely a fine company like Sig Sauer can put this somewhat expensive rifle in a better case for the customer.

www.prepperideas.com 516 reviewMy second gripe is a cleaning kit. The Sig came with a standard issue collapsible metal barrel rod with a patch tip on it and 2 wire brushes in a half ripped oily bag and 2 allen wrenches. The Delton came with a standard issue military cleaning kit in an aftermarket nylon velcro closed bag and a small bottle of cleaning fluid. This isn’t my first weapon, so I have a decent kit, but that’s not the point. Some that buy this may not have one and again, it’s a fairly expensive rifle that is in a well saturated sector of the gun market and it wouldn’t hurt to throw a little more value overall to the package. Just my .02.

The Sig did include ergonomic pads for the front rail, which are actually pretty nice and needed because that front grip is probably going to work like a cheese grater on bare hands if you’re putting this thing to work. Also included is a barrel plug and lock The Sig also comes with a single Magpul magazine, the cheaper Delton came with a single steel mag . The Sig comes with a better sling in my opinion in the form of a quick release push button 2 point sling. Comfortable to walk with, easy to get in and out of. The Delton came with a standard issue nylon shoulder sling. The Sig also comes with flip-up sights, where the Delton came as flat top with standard gas block tall iron sight and 4 sided metal Picatinny hand guard.

In comparison, other than the cardboard box, the Sig is by far a better purchase for the money in the way of what you get in the box. However I feel that Sig Sauer, with the great history they have could have done a little better on the details of the package as a whole.

The Rifle

Item Number R516G2-16B-P
  Action Semi-Auto
  Operating System Short stroke pushrod, Rotating Bolt
  Caliber 5.56mm NATO
  Overall Length 35.7 in
  Trigger Type MIL-SPEC
  Trigger Weight 7.6 lbs
  Barrel Length 16.0 in
  Rifling 1 in 7in
  Number of Grooves 6
  Weight w/out Mag 7.3 lbs
  Mag Capacity 30 Rounds
  Mag Type AR-15 Type, Aluminum
  Accessory Rail Yes
  Features Advanced pushrod gas system, Flip-up adjustable iron sights
  MSRP $1,666.00
  CA Compliant Compliant Models Available
  MA, NJ, NY, CT Compliant Compliant Models Available

As you can see this is a push rod weapon. If you don’t know, a push rod weapon does away with the gas tube to actuate the recoil/reload cycle of the rifle and runs the length of the barrel. Instead a solid pushrod (actuated by a gas piston) is used which means no carbon build up which ultimately affects the performance of the rifle. This goes a long way to fix the overall image of picky reliability that the AR platform has had practically since it’s birth. From my knowledge, the AR has always had the  tag of being a bitch when it gets dirty so you have to seriously keep it clean or you’re almost assured a firing cycle problem at an inopportune time. That’s one of the reasons people really like the slightly less accurate AK platform, pure reliability, and you can get them for dirt cheap. You have to really beat up an AK for it to not fire, and usually an AR needs to just miss a cleaning or get some dirt in it. The pushrod system, which is used by many manufacturers, seems to take care of that issue, but I’ll wait to be all giddy about it until I run a couple hundred more rounds through it and see.

The Optics

Even though the 516 comes with adequate flip up sights, I wanted a good optic system. I selected the EOtech 512 holographic sight also from Shoot Straight for $435. Their internet price is $639, I don’t know what that’s all about, you might want to call them or go down their if you’re local.  I know a lot of guys go with a big scope for a rifle that will reach out to 1000 yards or whatever. I am not concerned with the guy that is 300 or 500 yards away, I’m not a sniper, nor do I want to appear to be. I’m in an urban area where a totally clear 300 yard line of sight is rare, and this weapon is intended for home protection. I’m more concerned with the guy 25 yards away at the end of the driveway or in the back yard, so the Eotech is just fine. If i want to go long range there are magnifires that can be added to it, but for now, I’m good. I’ve seen a lot of good reviews on it, haven’t really heard anything derogatory about the sight one way or the other. It is a little expensive at $435 and I haven’t really seen them much lower. Runs on two AA batteries that are loaded into the nose by removing the front clip.

The EOtech is pretty straight forward with elevation and windage adjustments on the right side and 2 buttons on the back face that turn the sight on, increase or decrease brightness. Starting the sight requires pushing either one of the buttons, turning it off requires pushing both at the same time. If you start the sight with the “down” arrow, it will automatically turn off after 4 hours. If you start it with the ‘up’ arrow, it will turn off auto in 8.

www.prepperideas.com eotech 512 optics

One of the things I really like about the EoTech is that big thick guard going over the top. Its about 1/8th inch thick and feels like steel. Holographic sights and the rough conditions that a rifle sees generally don’t mix well. There are only so many drops, bumps and beatings that a holo sight takes before it’s a paperweight. The extra protection of the guard is pretty nice. The brightness controls on the 512 give the optics a good range to adjust to the individual shooter’s eye.

The Range

I wanted to see what the weapon and sights would do straight out of the box. I did not oil or tweak the rifle at all. Shoot Straight has an indoor range on premises so I picked up the rifle, (2) boxes of 20 round 5.56 (Federal) NATO ammo, 2 silhouettes and literally walked about 20 feet from cash register to the range. The weapon had nothing more on it than a light coat of oil from the factory.

The Eotech was purchased for the rifle from Shoot Straight a few days prior and hasn’t been on anything else. I un-boxed the rifle and the optics and assembled the package at the range. I was actually kind of pressed for time because the range was closing in an hour so I didn’t get a chance to really get to know the weapon, just do a quick sight job on the optics and get a general feel for it.

After securing the sight to a comfortable place on the top rail so that I still had a little room to access the rear buttons, I loaded up 20 rounds in the Magpul, taped a target on the rail and bummed a sharpie from the range master because I’m a knucklehead that came unprepared to sight a rifle. I fired in 3 round groups

www.prepperideas.com first round target

Fire 3, bring the target back, number, make adjustments to the EoTech, send target back down range. Rinse and repeat. until I got down to where I wanted. This is at 25 yards.  The optics were actually sited in by round 5/6 and round 7 was apparently me having a brain cramp or something.

I changed the target out, reloaded the next 20 rounds and was able to get this with the first 3 at 25 yards

www.prepperideas.com 3shot

Not too bad. These shots were from a standing, supported position

I ran the target back down range to the 25 yard mark still standing, unsupported:

www.prepperideas.com 20 round mag

Make note, I fired 20 rounds at this target and I can only make out 15 distinct holes. There were no blanks or misfires and it was an indoor concrete range that was pretty well lit, so I think I would have noticed if I went completely wide and missed a man sized target 5 times. So that means that 5 of those 20 rounds went in the same hole, there at the upper right. To me that is pretty impressive for a rifle AND optics to come straight out of the box, not cleaned, oiled, greased, anything. be sighted with half a mag and 5 of the next 20 rounds go in the same hole in the bullseye. I know it’s not me, I’m not that good.

I did not even try the flip sights really because I was giddy like a school girl over the Eotech and couldn’t wait to get it on the rifle and straightened up. I will try them out the next range and update but by the looks of them, they look like very adequate sights and I don’t doubt once they are tuned in, if they need be at all, similar performance will be likely. The complete EOTech/Sig Sauer 516 package came out to just a little over $1800. It took about 15 rounds to get the EOTech lined out and probably would have taken less than that but in all fairness, I had been playing around with the elevation/windage the evening before to see if my dogtag could be used for the adjustments and turned them so the optics weren’t exactly factory out of the box. My bad. The only accessories I plan on adding to the rifle is either a broom handle or slanted handle foregrip and a light, and it will probably be a combo unit if the price is right.

The weapon fired flawlessly. No hangs, no issues at all, but again, that’s only 40 rounds. Soon I’m going to spend a bit of time down there running some rounds through to see how it does as it gets more broken in.

My first impressions of the rifle at this point is that it seems pretty solid. It handles and fires very well and was easy to get up and rolling. Well worth the money at this point.

As for Shoot Straight, they were pretty good to deal with. The staff was knowledgeable and helpful, I’ll probably buy from them again.

Related Products:


Daily YouTube – Choosing a Firearms for Concealed Carry

$
0
0

“This article was first published at reThinkSurvival.com.”

Here’s another video by Bushcraft412 discussing what you need to think about when choosing a handgun for concealed carry.

[Note: This video was not made by the editor of RTS.]


Prepping 101 – Best Gun For Home Defense

$
0
0

BestGun1-708x404

By P. Henry

There are few things more likely to start a fight than the discussion of firearms and more specifically, what the best options for a defensive weapon are if you are just starting your emergency preparations. There are entire survival forums on this subject alone and if you want opinions, there are lots of places to find them. Similar to the conversation regarding Bugging Out Vs. Hunkering down, there are a lot of options, opinions and reasons why you should or should not do one or the other given by everyone.

Speaking of opinions, I have my own on the subject of the best weapon you can buy and I will share it now along my rationale for having said opinion and I welcome anyone to comment if you agree or if you disagree. One of the purposes of this site is to provide information and if we have to settle some of this in the comments, that’s fine by me.

To frame the case for my belief on this subject a little more clearly, I will throw out the disclaimer that when I make this recommendation I am speaking to people who do not have any other firearms currently. If you are realizing just now that you may need a firearm for home defense and are looking for the best weapon to purchase first, this post is intended for you.

For the person who has nothing, I am going to go out on a limb now and describe what I think the best weapon you can purchase “right now” for a lot of various factors. The factors for deciding this weapon are based upon current events and the political climate to no small degree.

To cut to the quick, I will say that if you don’t buy any other weapon, a 12 gauge shotgun is the absolute best option you have right now. Let the cussing begin! Why do I say a shotgun and not a pistol or machete or AR or AK? I’m glad you asked!

Cost

A 12 gauge shotgun is about the cheapest gun you can buy when you consider that most handguns now are selling for over $500 unless you buy a .380 concealed carry. Can you spend $3500 on a fancy shotgun that will be a collector’s piece? Of course you can but that isn’t what I am talking about. If you have a ton of money you would obviously not stop here, but for the average person trying to make wise decisions with their finances, a shotgun is practical and affordable for most of you out there.

When people start looking for a defensive or tactical shotgun the focus turns to 2 main models, Remington and Mossberg. The Remington 870 is a legend and is the standard issue shotgun for a lot of police departments and armed forces. That alone drives the cost up. Adding all sorts of cool hardware like Picatinny rails, fore grips and pistol grips run the cost up too. You don’t need all of that stuff. Not now anyway. You need something to protect your family and the nice Benelli semi-auto isn’t called for here either.

I recommend buying a used shotgun that you don’t pay more than $300 for. Go to your local gun show and you will find lots of options. If you are looking in the right place you can get a new Mossberg for less than $200 but with each passing day that gets harder and harder. Is the Mossberg any good? Yes they are. Is it better and more reliable than a Remington 870? I don’t know. Here is what I do know though and that is if you do not have anything, you will wish you had something, even an old Mossberg when the Zombies or bad guys start coming in the front door.

If you are curious, there are lots of reviews on YouTube comparing the two and you can make your own mind up. There is an entire review comparing the Mossberg 590A, the Remington 870 and the Winchester 1300 defender by Nutnfancy that I highly recommend for its thoroughness. Either one is going to work just fine for you and you might find another model entirely. The brand isn’t the point so much as the type of weapon.

Availability

This is an easier one to deal with. Unless you have been living underground in your own doomsday bunker, you know that guns and ammo are flying off the shelves. If you were waiting to purchase an AR, you will have a while to wait if you are lucky. If you aren’t lucky, you might be SOL on the AR front. Shotguns however do not have the attention of the gun grabbers yet and they are still available. This availability results in cheaper prices as mentioned above. You can still go into your local sporting goods store an easily find a shotgun. You can’t say the same for an AR.

Ease of purchase

Shotguns or long guns generally don’t have the ridiculous licensing requirements that purchasing a handgun does. After a quick call and some paperwork, (provided you have a clean background) you can walk out with your very own 12 gauge piece of mind to add to your security preparations. You can go on your lunch hour and bring a brand new present home to your spouse after work. It’s better than flowers!

Availability of ammo

Just a quick check online finds plenty of ammo for the 12 gauge. You can’t say that for most common pistol calibers especially with the DHS purchasing 1.6 billion rounds for their own use. Another plus is there is a pretty wide variety of ammunition you can use in most shotguns. Most shotguns accept either 2 ¾ inch or 3 inch shells. Some, like my particular Mossberg model accept both. You then have Buckshot which is the most deadly, Slug, steel shot, bird shot, turkey or varmint loads and target loads. So many choices, so little time! You can easily buy a few boxes and have plenty of security for most any scenario. Now, in a total grid-down, end of the world apocalypse you will wish you have millions of rounds stored up, but we have to start somewhere. I like to buy a box of each caliber that I have (when I can) whenever I go to a sporting goods store and keep it locked away.

Usefulness

A 12 gauge shotgun is one of the most versatile weapons you can have if the SHTF. You can of course use this as your defensive weapon and you can hunt small and even large game with it. A 12 gauge with bird shot is good for most small critters or birds but you want to be careful you don’t blow them to pieces.  Throw some buckshot in there and you can go after the lone doe after all of the other deer are gone. A .22 is similarly good at plinking and shooting small game, but I wouldn’t want to face down a gang of intruders with a .22.

Accuracy

One good thing about shotguns from the perspective of someone defending their home is that you don’t have to be as accurate as you do with a handgun. A shotgun has a nice blast pattern that will hit anyone in the general direction down range to a certain extent. The flip side is that a shotgun is not generally relied on for its accuracy or range. This is a close quarters type of defensive weapon so you won’t be picking off the bad guys at 100 yards with this. When the Mutant Zombie Motorcycle gang rolls into your town, they will need to get a little closer before you can take them out, but that is for a different post. Another consideration since we are discussing accuracy is that you have to practice common sense. If someone is in your house and you shoot a shotgun, those rounds will go through Sheetrock walls and could hit someone on the other side. This is no different from just about any other type of common round though.

Ease of Use

A good shotgun is pretty simple; point and shoot. In some cases, the racking part to get another round into the chamber takes a little practice. You want to make sure you don’t eject the good shell you had in the chamber so it isn’t perfect, but with practice this can be minimized. Most people will recommend a 20 gauge for a woman because they kick less but I guarantee you that your wife won’t mind the kick at all if someone is coming after her and she is forced to fire. A shotgun is easily handled by a woman and has less moving pieces to remember when you are stressed. That goes for guys too. Just the simple act of racking the shotgun and the unmistakable sound that causes may prevent you from having to use it in the first place.

So for all of those reasons, the 12 gauge is my hands down favorite for your first defensive weapon for the home. If you have more money, there is a few other items I would recommend for your survival batter of arms, but I will save that for later too.- The Prepper Journal

Please let me know if you have any thoughts on the best weapon for the person who has nothing.


Prepping 101 – Best Gun For Home Defense

$
0
0

Prepping 101 – Best Gun For Home Defense

By P. Henry

There are few things more likely to start a fight than the discussion of firearms and more specifically, what the best options for a defensive weapon are if you are just starting your emergency preparations. There are entire survival forums on this subject alone and if you want opinions, there are lots of places to find them. Similar to the conversation regarding Bugging Out Vs. Hunkering down, there are a lot of options, opinions and reasons why you should or should not do one or the other given by everyone.

Speaking of opinions, I have my own on the subject of the best weapon you can buy and I will share it now along my rationale for having said opinion and I welcome anyone to comment if you agree or if you disagree. One of the purposes of this site is to provide information and if we have to settle some of this in the comments, that’s fine by me.

To frame the case for my belief on this subject a little more clearly, I will throw out the disclaimer that when I make this recommendation I am speaking to people who do not have any other firearms currently. If you are realizing just now that you may need a firearm for home defense and are looking for the best weapon to purchase first, this post is intended for you.

For the person who has nothing, I am going to go out on a limb now and describe what I think the best weapon you can purchase “right now” for a lot of various factors. The factors for deciding this weapon are based upon current events and the political climate to no small degree.

To cut to the quick, I will say that if you don’t buy any other weapon, a 12 gauge shotgun is the absolute best option you have right now. Let the cussing begin! Why do I say a shotgun and not a pistol or machete or AR or AK? I’m glad you asked!

Cost

A 12 gauge shotgun is about the cheapest gun you can buy when you consider that most handguns now are selling for over $500 unless you buy a .380 concealed carry. Can you spend $3500 on a fancy shotgun that will be a collector’s piece? Of course you can but that isn’t what I am talking about. If you have a ton of money you would obviously not stop here, but for the average person trying to make wise decisions with their finances, a shotgun is practical and affordable for most of you out there.

When people start looking for a defensive or tactical shotgun the focus turns to 2 main models, Remington and Mossberg. The Remington 870 is a legend and is the standard issue shotgun for a lot of police departments and armed forces. That alone drives the cost up. Adding all sorts of cool hardware like Picatinny rails, fore grips and pistol grips run the cost up too. You don’t need all of that stuff. Not now anyway. You need something to protect your family and the nice Benelli semi-auto isn’t called for here either.

I recommend buying a used shotgun that you don’t pay more than $300 for. Go to your local gun show and you will find lots of options. If you are looking in the right place you can get a new Mossberg for less than $200 but with each passing day that gets harder and harder. Is the Mossberg any good? Yes they are. Is it better and more reliable than a Remington 870? I don’t know. Here is what I do know though and that is if you do not have anything, you will wish you had something, even an old Mossberg when the Zombies or bad guys start coming in the front door.

If you are curious, there are lots of reviews on YouTube comparing the two and you can make your own mind up. There is an entire review comparing the Mossberg 590A, the Remington 870 and the Winchester 1300 defender by Nutnfancy that I highly recommend for its thoroughness. Either one is going to work just fine for you and you might find another model entirely. The brand isn’t the point so much as the type of weapon.

Availability

This is an easier one to deal with. Unless you have been living underground in your own doomsday bunker, you know that guns and ammo are flying off the shelves. If you were waiting to purchase an AR, you will have a while to wait if you are lucky. If you aren’t lucky, you might be SOL on the AR front. Shotguns however do not have the attention of the gun grabbers yet and they are still available. This availability results in cheaper prices as mentioned above. You can still go into your local sporting goods store an easily find a shotgun. You can’t say the same for an AR.

Ease of purchase

Shotguns or long guns generally don’t have the ridiculous licensing requirements that purchasing a handgun does. After a quick call and some paperwork, (provided you have a clean background) you can walk out with your very own 12 gauge piece of mind to add to your security preparations. You can go on your lunch hour and bring a brand new present home to your spouse after work. It’s better than flowers!

Availability of ammo

Just a quick check online finds plenty of ammo for the 12 gauge. You can’t say that for most common pistol calibers especially with the DHS purchasing 1.6 billion rounds for their own use. Another plus is there is a pretty wide variety of ammunition you can use in most shotguns. Most shotguns accept either 2 ¾ inch or 3 inch shells. Some, like my particular Mossberg model accept both. You then have Buckshot which is the most deadly, Slug, steel shot, bird shot, turkey or varmint loads and target loads. So many choices, so little time! You can easily buy a few boxes and have plenty of security for most any scenario. Now, in a total grid-down, end of the world apocalypse you will wish you have millions of rounds stored up, but we have to start somewhere. I like to buy a box of each caliber that I have (when I can) whenever I go to a sporting goods store and keep it locked away.

Usefulness

A 12 gauge shotgun is one of the most versatile weapons you can have if the SHTF. You can of course use this as your defensive weapon and you can hunt small and even large game with it. A 12 gauge with bird shot is good for most small critters or birds but you want to be careful you don’t blow them to pieces.  Throw some buckshot in there and you can go after the lone doe after all of the other deer are gone. A .22 is similarly good at plinking and shooting small game, but I wouldn’t want to face down a gang of intruders with a .22.

Accuracy

One good thing about shotguns from the perspective of someone defending their home is that you don’t have to be as accurate as you do with a handgun. A shotgun has a nice blast pattern that will hit anyone in the general direction down range to a certain extent. The flip side is that a shotgun is not generally relied on for its accuracy or range. This is a close quarters type of defensive weapon so you won’t be picking off the bad guys at 100 yards with this. When the Mutant Zombie Motorcycle gang rolls into your town, they will need to get a little closer before you can take them out, but that is for a different post. Another consideration since we are discussing accuracy is that you have to practice common sense. If someone is in your house and you shoot a shotgun, those rounds will go through Sheetrock walls and could hit someone on the other side. This is no different from just about any other type of common round though.

Ease of Use

A good shotgun is pretty simple; point and shoot. In some cases, the racking part to get another round into the chamber takes a little practice. You want to make sure you don’t eject the good shell you had in the chamber so it isn’t perfect, but with practice this can be minimized. Most people will recommend a 20 gauge for a woman because they kick less but I guarantee you that your wife won’t mind the kick at all if someone is coming after her and she is forced to fire. A shotgun is easily handled by a woman and has less moving pieces to remember when you are stressed. That goes for guys too. Just the simple act of racking the shotgun and the unmistakable sound that causes may prevent you from having to use it in the first place.

So for all of those reasons, the 12 gauge is my hands down favorite for your first defensive weapon for the home. If you have more money, there is a few other items I would recommend for your survival batter of arms, but I will save that for later too.

Please let me know if you have any thoughts on the best weapon for the person who has nothing. – The Prepper Journal


How to Safely Clear Your Home When You Think There’s an Intruder

$
0
0

By Jason Hanson

Standing to the left of the door, with the gun close to his body, the author prepares to push open the door and quickly take a step back to his original position.

Standing to the left of the door, with the gun close to his body, the author prepares to push open the door and quickly take a step back to his original position.

My lazy beagle Toby was loudly barking as I’d never heard him before.

Usually I would have waited a minute or two to see if I heard any footsteps, strange noises, or a window breaking, but I didn’t have time to spare. My mother, who had cancer, was bedridden on the couch on the main floor of our house and I needed to get to her before a potential intruder did.

I cleared the house as quickly and safely as I could, and my mother was fine. I never found out what Toby was barking at that night, but I have no doubt he scared away a burglar.

Having my mother restricted to the main floor of the house made it necessary to leave my bedroom that night and make sure she was okay. However, if it’s 3:00 a.m. and you hear a window break or you know someone is trying to enter your house, the last thing you want to do is leave your bedroom to go and confront the person. In the ideal world you would get your family together into your designated safe room (such as your master bedroom) and wait there until the police arrive.

Of course, we don’t live in an ideal world. Perhaps you’re like I was and you have a family member living on the first floor or even in the basement. If this is the case you have no choice but to leave your bedroom; therefore it’s necessary for you to know how to safely clear your house.

If you’ve ever seen the police clear a house, you know they always go in with a minimum of two people. But you and I likely won’t have the choice to grab someone else at 3:00 a.m. to come help us, so here’s how you properly clear a house by yourself, even though it’s a dangerous situation you want to try to avoid at all costs.

how-to-safely-clear-your-home-author-slightly-leans

The author slightly leans to the left as he’s clearing a corner, so an intruder will hopefully see the gun first before the rest of his body.

First off, if you hear a noise in the middle of the night and you need to clear your house, you had better be able to take one or two steps from your bed and have access to your gun, which should be “cocked and locked.” In other words, the gun should have a round in the chamber so all you have to do is pull the trigger to shoot. Right next to your gun should be your flashlight. I use a SureFire G2X Tactical light.

Many houses have enough ambient light for you to maneuver around without the need to have the flashlight on all of the time, so just use it for target identification purposes so you don’t accidentally shoot the wrong person. (Also, read Tom Givens’ excellent article Flashlight Techniques for Home Defense in the July 2011 issue of CCM.)

Once you’ve got your gun and light, it’s time to leave the bedroom. If you’ve got a traditional house, you’ll likely end up entering a hallway. Stay close to the wall on the one side of the hallway and avoid walking down the middle, so you minimize your outline and make yourself less of a target.

As you slowly move down the hallway you’ll probably come across a bedroom or bathroom door. What should you do? If you’ve got a family member living in the basement and time is important, and you’re pretty sure nobody made it upstairs, then just move on past the door. I know this isn’t tactically correct, but we’re talking about a real life scenario here. If you’ve got your daughter sleeping in the basement, then no parent is going to take the time to clear every upstairs bedroom when they hear an intruder on the first floor or proceeding down the basement stairs.

Try and expose as little of your body as possible. If the intruder happens to have a gun, you don’t want to be an easy target!

Try and expose as little of your body as possible. If the intruder happens to have a gun, you don’t want to be an easy target!

However, if you don’t have to rush downstairs, you’ll certainly want to check the room ahead. But before you attempt to open the door (or any door in your house for that matter) you need to pull the gun close to your body so the inside of your wrist is practically touching your rib cage. In other words, instead of having your arm fully extended, your elbow should be bent about 90 degrees. This position gives you more control over the firearm in case someone was to try and reach for it. Another reason you bring the gun in close is so that you don’t accidentally point the gun at your other hand while it’s opening the door.

Assuming the door you’ve approached is on your right, you’ll want to stand against the right side wall, with your gun close to your body, while reaching for the doorknob with your other hand. (Do not stand in the doorway. You should be reaching across while remaining against the wall.) If the door opens away from you then turn the doorknob and give the door a solid push and immediately take a step backward against the right side wall again. If the door opens towards you, pull the door swiftly towards you and again take a step backward.

Once you’ve opened the door it’s time to “slice the pie.” This is a method used to clear corners and doorway entrances where you clear each area in small slices. For instance, if you had just pushed your door open and stepped back you would be standing against the right side wall. Obviously, from this position you can’t see into the entire room and you certainly don’t want to take a step into the doorway and fully expose yourself.

So, you would begin to take small side-steps in a semi-circular motion. In other words, if you’re on the right side of the door, you’ll end up on the left side by going in a wide semi-circle around the doorway entrance. Each time you take a side-step, have your body slightly lean in the direction you’re headed so that if an intruder is in the room they will see the muzzle of your gun first and the rest of your body won’t be exposed.

Each time you take a step, give a brief pause so that you can scan as much of the room as possible and you can determine if that part of the room is clear. Once you end up on the left side of the door, you’ve done as much as you can to clear the room from the outside. Also, I realize slicing the pie may seem confusing, so please refer to the diagrams I created, which should make this process clearer.

Try and expose as little of your body as possible. If the intruder happens to have a gun, you don’t want to be an easy target!

If you approach a door from the right hand side, take small steps in a semi-circle, until you eventually end up on the left side. Once you’ve accomplished this and have scanned as much of the room as possible, it’s time to enter.

Don’t forget to have patience while clearing a corner. This is not a time to rush unless a family member is on a lower level and you must immediately reach them.

Now that it’s time to enter the room, you’ll want to quickly step through the doorway and move to the opposite corner. For instance, if you’re entering the doorway from the left side, move to the right corner and give a quick look over your shoulder to make sure nobody’s hiding in the left corner. Don’t forget to check all places an intruder could be hiding such as under a bed, in a closet, under a desk or under any other large object.

Once you’re satisfied the room is clear it’s time to continue moving through your house. The next obstacle you’ll run into is the stairs. But before you just stand at the top of the stairs and make yourself an easy target, you’ll want to slice the pie just as you did with the doorway so you can make sure nobody is waiting at the bottom of the stairs to attack you. Again, start on one side of the wall and take small steps in a semicircle so you can see a little bit more of the stairs each time.

Amanda Hanson demonstrates how the gun should be close to the body before attempting to open a door. This helps to prevent someone from grabbing the gun out of your hands. Notice, she also has her finger off the trigger.

Amanda Hanson demonstrates how the gun should be close to the body before attempting to open a door. This helps to prevent someone from grabbing the gun out of your hands. Notice, she also has her finger off the trigger.

Once you do a full scan of the stairs, make your way down, while at the same time scanning everything you can see. The stairs are a nightmare because you’ve likely got a room entrance at the bottom of the stairs to your left and then you’ve got a large hallway to your right with a number of openings too.

Since there is no way to see into the room on the left while going down the stairs, try and scan as much of the hallway to your right as possible. Once you get to the bottom, slice the pie for the room on your left while constantly glancing over your shoulder to see if anyone is approaching on your right. As you can see, it would be very easy to get ambushed while going down the stairs (which is just one of the many reasons police officers always go in teams of at least two while clearing a house).

You’ll clear the rest of your main floor just as you cleared your top floor when first leaving your bedroom. Every time you come to a corner or a door, you’ll want to slice the pie so you’ll hopefully see the bad guy before he sees you. If you have a basement, you’ll systematically clear it the same way too. Also, remember to have patience throughout this entire process. Each time you take a semi-circular step around a corner or doorway entrance, pause and scan the area from the floor to the ceiling.

Perhaps most importantly, since clearing a house is such a dangerous activity, you need

The author’s clearing tools of choice: Glock 19 9mm handgun and SureFire G2X Tactical light.

The author’s clearing tools of choice: Glock 19 9mm handgun and SureFire G2X Tactical light.

to practice it as often as you can. For example, last month I got back from a ten day vacation in Utah. I knew my house was secure and no alarms had gone off, however, when I got back to my house from the airport I didn’t just rush in and plop myself down on the couch.

Instead, I opened my front door and took a step back and sliced the pie. Next, I cleared my entire house to make sure it was empty. Not only is this good practice, but I had been gone for ten days, so there’s always a possibility someone could have been hiding in my house.

Another good activity is to practice clearing the house with your spouse or kids. Tell them to go hide somewhere and play a fun game of hide and seek. When you’re searching for them you’ll want to pay attention to see if they see you first or you see them first. Also, if you’re slicing the pie, have them point out the moment they see you or what body part they see first. This will help determine if you’re doing it correctly—the muzzle of the gun is the first thing they should see, not your legs. Obviously, if you do play this game, don’t go around with a real gun. Use your finger or use a plastic training gun instead.

Again, I can’t emphasize enough that clearing a house by yourself is the last thing you want to do. If you still don’t believe me, and you’re the macho type with a huge ego, then play the hide and seek game I mentioned above. After your spouse has surprised and “killed” you for the tenth time, you’ll fully realize that if possible, waiting in your safe room while the police clear the house is the much smarter option. – The Prepper Journal

Read the original article


Handgun Holster Construction and Selection: Part I

$
0
0

Handgun Holster Construction and Selection: Part I

By Aaron Cowan

Editors Note: This is a two part article I found from the guys at the Recoil Magazine website and gives a really thorough introduction into holsters and methods of carry. I will have both of these on the site this week because there is a lot of great information for those who are looking to purchase your first or new holster.

There are hundreds of holster options available.  Inside the waistband, outside the waistband, shoulder, ankle, thigh, level I, II, III retention, leather, kydex, canted, straight pull…the options are many and quite frankly make my head hurt, just as the many different opinions on what is the best method of carry and which holster you should use to do so.  What I intend to do here is address first the holster and then the method of carry. A word of caution: Anyone who has read my writing or taken a course with me knows that I’m not one to avoid Sacred Cows, nor do I like to give credence to the perception a piece a gear may have over the reality of its usefulness.  That said, while it’s not my intention to hurt anyone’s feelings, I may wind up doing so. Thus I’d ask you to keep an open mind about facts versus opinions and at least consider my arguments as you make your decision on what to carry. At the end of the day, it will still come down to informed personal preference.

For all intents and purposes, holsters come in three general materials: leather, Kydex, and nylon (or similar fabric).  There are hybrid holsters comprised of two or more of these materials, but these three are the building blocks from which all holsters spring.  Some materials lend themselves better to specific carry methods than others, just as some materials will offer better concealment than others.  Those of us who have been carrying a handgun for a few years or more all have “that box” tucked away somewhere, the box full of the next best holster that, in all actuality, really wasn’t.Handgun Holster Selection photo

I am guiltier than some; I try every new “advancement” in holster technology that comes along so I can be knowledgeable about it when I teach. That doesn’t mean I like it.  Often the improvements are just refinements. Some refinements just reflect the implementation of higher quality of materials or a different production process.  Every now and then someone comes along with a revolution in technology, but this isn’t always necessarily a good thing.

The most important consideration when it comes to material is its durability and the environment in which the holster is intended be used.  For example, a leather holster is not likely to hold up to harsh environmental conditions as well as one constructed of Kydex because no matter its quality, it’s still made of an organic material, like nylon (a polyamide). Organic materials decay faster when compared to Kydex (or comparable injection molded plastic). Leather and nylon are also prone to collecting moisture, which will cause them to swell and shrink depending on environmental conditions.  Leather and nylon holsters can perform well in harsh conditions depending on construction, but for almost all purposes Kydex would be the better choice.  This, when considered along with the retention limitations of a strictly leather or nylon holster should dissuade anyone from using leather or nylon for any extended period in austere environments.

For Kydex/polymer plastic holsters, the case for their resistance to the elements is a strong one.  A polymer holster, by virtue of its material offers greater rigidity and general protection than a leather/fabric design; however this advantage usually comes at the expense of concealability and in some cases comfort.  An inside the waistband holster made of Kydex offers little in the way of ‘give’ that a similar leather or nylon IWB provides.  The rigid nature of Kydex prevents it from conforming to the body and because of this, may prove uncomfortable to wear. This will obviously be affected by the location of carry and the quality of design.  Kydex rigs can offer a great number of active and passive retention options not offered by leather or nylon holsters, because of their rigid nature and the ability to build them with  reinforced retention devices.

Handgun Holster Selection photo

Fabric holsters are available in just about as many configurations as those of leather or Kydex, and some of them are almost decent.  Fabric is a preferred material for “one size fits all” flea market holsters you can find in the deep South, deep East LA, gun shows around the free world around, and virtually any gunshop in between.  These are the bread and butter of certain Third World sewing machines and have been hocked by pikers since the dawn of the modern age.  These holsters offer no rigid weapon support, and many lack even a way to keep them in your pants or on your belt. Of course I have seen a few fabric holsters that were well made, but they still have Kydex or leather cousins that would be a better purchase.  A fabric holster is arguably a reasonable choice for strictly range and sporting purposes, but for concealed carry I would strongly advise against it.

Handgun Holster Selection photo

The next consideration we have is the choice of retention level.  There are generally two types of retention; a method to secure the weapon in the holster for carry and a method to secure the weapon in the holster to prevent it from being taken away in a struggle.  The second category obviously provides for the first, whereas the first may not cover the second.  The requirement for greater retention, versus that of simply holding the weapon in place is an issue of need and prudence. For those carrying a weapon exposed, a higher degree of active retention is desirable.  For those carrying concealed, a lower level of retention may be adequate based on the reason for carrying (duty versus personal protection).

So what are the levels of retention?

No retention:  A friction lock holster, common and popular with Kydex holsters.  The handgun is retained by the pressure of the holster on the weapon with the assistance of gravity.  Not recommended for exposed carry.  Hold on, let me say that again; not recommended for exposed carry.

Level I:  Level I retention is often considered a single active security device such as a thumb break or internal lock which requires one step (such as unsnapping the thumb break) to draw the weapon.  Other than the friction of the holster on the weapon, there are no other retention features present.

Level II:  Level II combines level I features with one additional active retention system such as a tension point or internal lock requiring an additional step to clear (such as pushing down on the weapon before drawing or an index finger release button).  Level II is the lowest level for exposed street carry I would recommend.  Because level II introduces an additional active safety measure that must be cleared in order to draw the weapon, it requires more repetitious training, which becomes a safety issue.  I mention safety at this point because one of the most prevalent level II holsters on the market is the Blackhawk Serpa.

The Serpa has an index (trigger) finger activated button on the outside of the holster, pressed inward by the trigger finger in order to disengage the weapon lock and allow the draw.  The issue with this design is that the location of the button places the trigger finger over the trigger guard of the weapon as the weapon is drawn.  Under stress, the finger may depress the button and may remain hooked, with constant pressure against the body of the holster as the weapon is drawn.  With sufficient pressure, the finger may slip into the trigger guard as the weapon clears the holster, creating an opportunity for a negligent discharge.  As one of the four cardinal firearms safety rules directs us to place our finger straight and off the trigger (I teach on the frame of the weapon) until you are ready to fire, this holster breeds potentially bad habits as it positions the finger where it shouldn’t be.  Now, this may be an issue of training (or semantics) that could be explained away if we did not have evidence of more than a few negligent discharges (some of which are floating famously around the Internet video world).

This design flaw became such a large issue that many instructors, agencies, and departments banned the Serpa from use.  I do not recommend the Serpa for this reason alone.  For a level II control device, I prefer a hood and bale system or an internal thumb drive/button as both let the thumb do the work and don’t stack fine motor skill requests in the index finger to confuse under stress.

Handgun Holster Selection photo

Level III:  Almost exclusively duty holsters, level III combines three active security systems/devices into the holster that must be cleared in order to draw the weapon.   A popular combination is a bale/thumb release and shroud or a thumb break/thumb drive and directional cant.  If you are going to work in close proximity to others in potentially hostile situations, the level III is an excellent choice.  Despite the added level of security, it has been shown that with proper training, the draw from a level III can be just as fast as a level II ( see the Force Science Institute study).

Level IV:  Level IV bears mentioning just because there are still departments and units out there requiring its use.  A level IV is one more step, though as you can probably see, the training curve would get steeper, and it does.  I don’t support the idea of a level IV holster unless that fourth security device is an optional step that can be engaged for hazardous travel (rappelling, SCUBA, etc.) where weapon loss is an issue.  I am of the opinion that the level IV is a solution in search of a problem and only looks reasonable when you are a nervous salad eater and the closest you come to the field is reading about it from a desk.  We already have a level IV; it’s called weapon retention training.

Finally, we get to the method of carry.  There is Outside the Waistband (OWB) and Inside the Waistband (IWB) with numerous variations thereof.  If the choice is up to you, consider your needs first (such as weapon size and your size) and then consider how much of your wardrobe you are willing to adjust for concealment.  If the holster is for duty carry, concealment may not be an issue for you.  As with anything, you are going to get what you pay for.  Holster quality and service life are almost always linked to price.  If you can buy it new with a $20 bill and get change back, chances are it’s not a good holster.

Handgun Holster Selection photo

OWB holsters include the traditional hip carry, thigh/leg rig, shoulder carry, and chest mounted.  While there may be other methods of OWB carry, these are the four most common OWB methods we will discuss tomorrow in Part II. We’ll also discuss IWB methods, including appendix carry. I hope you’ll rejoin me then, and remember: real training begins when your comfort zone ends. – The Prepper Journal


Handgun Holster Modes of Carry: Part II

$
0
0

Handgun Holster Modes of Carry: Part II

By Aaron Cowan

Part II: Modes of Carry

Yesterday we talked about holster selection based on need, intended environment and material. Today we’ll talk about the different methods of OWB (Outside the Waistband) and IWB (Inside the Waistband) carry.

Hip carry

Hip carry is the traditional method of carry for a handgun, the most common and strictly speaking from a biomechanical standpoint, the most efficient (i.e. the distance of travel for the draw to the point of fire with the fewest steps necessary).  A handgun at the hip provides a stable platform allowing for ease of access and a strong position for retention due to its location near the center of balance.  The most common holster positions are straight cant (muzzle directly down) and a 15/20 degree cant (also known as FBI cant).  FBI cant is helpful in making a hip carried weapon more concealable, but it will slow muzzle to target on the draw, and by its position forces the wrist into an extreme bend in order to draw the weapon.  The necessary articulation in order to draw the weapon can be reduced depending on the location of the weapon (pushing towards the front or back of the belt) but it still will present an issue for certain shooters.  If your body type is one that requires as much concealment help as you can get, a canted holster may be a good choice, just realize that a zero cant holster will be more efficient.

Handgun holster selection II: how will you carry? photo

When concealed, either under a T-shirt or cover garment, hip carry does have a higher chance of printing against the clothing but access to the weapon can be made quickly.  To avoid printing, clothing can be bought in a larger size, or the weapon can be positioned higher on the belt (a High Ride model holster) to push it into the natural curve of the body above the hips.  Weapon size, carrying a compact or sub-compact as opposed to a full size handgun will also help with concealment.

Handgun holster selection II: how will you carry? photo

Leg rig

Thigh carry, leg rig, drop-leg, whatever you want to call it, is a good idea in a small (very small) set of circumstances.  In every other situation it’s a bad idea.  I hate to be blunt, but it’s true.  The leg rig has been around (in its present form) for a little more than 30 years, introduced first (arguably) by Safariland at the request of Special Operations Forces who wished to have an alternate carry method for their secondary weapon when wearing scuba gear, a parachute harness or rappelling harness.  The leg rig was also useful in allowing the draw to clear the body armor of the time.  Obviously the first issue with a leg rig is that it is attached to a part of the body that by nature is designed to move.  This tends to bang the weapon around, knock it into the environment and allow it to get hung up on anything that wants to reach out and grab it.  Leg rigs also create an almost never ending need for adjustment.  Empirically speaking, the leg rig has been shown to have a much slower (as much as half a second) draw than hip carry.  Of course I have seen users adjust their leg rig to a position where it is comfortable and carries close to the body with quick access…they did this by drawing it nearly to the belt line, which is where a hip holster could be worn in the first place (including with a 1” drop attachment now available for many styles).

With the advent of thinner body armor and the evolution of load carrying equipment in general, the majority of plate carriers no longer present an issue for a hip worn weapon. This makes the use of a leg rig a moot point.  The leg rig is a status symbol for some, or a just because decision for others.  My advice – don’t use it unless you genuinely need it.  If the leg rig is a mission for job requirement, by all means go forth and be uncomfortable.  Avoid leg rigs made of fabric (read: cheap leg rigs) and go for a sturdy Kydex such as a Safariland.  Because the holster is going to take more abuse than a hip carried holster, the stronger the holster the better.  I once saw a gentleman pressed by exigent events run three blocks. Sadly, his sidearm only ran two.  Caveat Emptor.

Shoulder carry

The shoulder holster has been around for almost (or as) long as the hip holster.  Generally it’s a harness system worn over the shoulders that supports the handgun under the support hand shoulder in either a vertical or horizontal position.  These holsters usually begin at level I retention up to level III and require the user to reach across their body to draw the weapon with their primary hand and that’s where the problem begins.  We do not want to point our weapon at anything we do not intend to shoot., yet when the handgun is drawn from the shoulder holster, the user will muzzle a wide area in the arc of the draw before the weapon is brought to target.  The issue there is explicit.  Now, the shoulder holster does conceal the weapon better than some other holster types, but it is a safety issue by design and in no way faster than a hip carry draw because of the distance the muzzle must travel before coming to the target.  A straight line beats an arc all day long.

I do not recommend a shoulder holster, as the only real advantage I can see is that if concealability.  One might point to the fact that the weapon is easier to access in a seated position than other holster types and this is true. However, this a small advantage for a under very limited conditions and may not be worth the ND (negligent discharge) risk you will have with this type of holster.  Comfort and concealability should not replace safety.

Chest carry

Chest carry implies exactly what it sounds like; the weapon is carried on the chest, usually in a tactical role, with the muzzle of the weapon towards the deck or at a cant for ease of draw.  This method of carry is popular and almost exclusive to the military/security contractor world as it is most common on plate carriers worn in both professions.  Like shoulder holsters, chest carry presents the same safety issues, though unlike shoulder carry, the time to target is near (sometimes faster) than that of hip carry due to the fact that the weapon is carried high on the chest in the handgun workspace and only has to make a 90 degree turn and be punched out to be put into service.

Chest carry has problems of its own in addition to those it shares with shoulder carry.  The main problem in my mind is that if a long gun is carried (which is likely) the sling of that weapon is going to have a nasty habit of hanging up on the chest mounted pistol.  This is tantamount to short sheeting your rifle.  When you need it, the handgun is going to take away just enough sling to force you to untangle it before you can use it.  The second issue with chest carry lies in shooting positions such as prone.  It is hard to lay prone on a chest mounted pistol, especially if the holster is bulky Kydex (this creates obvious problems if you are on the embarrassing end of a two-way range and you’re trying to make yourself small). Lastly, if the holster is similar in design to a Serpa, debris from lying prone stands a good chance of jamming the release mechanism for the handgun.   If your occupation requires extensive use of a vehicle in a high risk environment, a chest rig provides quick access to the weapon, more so than even a shoulder holster would.  My advice is to use a holster such as a Safariland with a MLS/QLS system that can be mounted on the chest when needed, then moved to a hip (or even thigh if that’s your bag) mount when on foot.

Handgun holster selection II: how will you carry? photo

Ankle carry

I mention ankle carry almost as an afterthought, though it is still a very popular method of carry, usually for backup weapons.  In this situation, a good holster is one that will protect as much as the weapon as possible and will be very moisture resistant.  A hybrid design such as a leather/Kydex or a nylon/leather may be best.  When purchasing, find a model that provides the most amount of hook/loop real estate as possible both vertically and horizontally so that retention of the weapon and the holster will be high.  I would recommend ankle for a backup weapon, but not your primary.  Any weapon that is going to conceal well on the ankle is probably not going to hold enough ammunition for any sort of sustained fight if that’s what you find yourself in.  Since none of us have a crystal ball, ill use an old adage; bring enough gun.

Editor’s Note—it can also be problematic if you wind up on your back in a fight and cannot get to your ankle to draw, as I discovered once to my chagrin.  DR

Inside the Waistband (IWB) holsters

For Inside the Waistband (IWB) holsters, there are three general types; Straight pull, canted and appendix carry.  IWB holsters can be found in all three common holster materials and come in near countless configurations to aid in concealment.  The most common level of retention is friction lock, though level I and II are not unheard of.

The most important aspect of an IWB holster (besides safety and quality) is going to be comfort.  Because the holster will be worn against the body, the material should be reasonably flexible, durable and sweat resistant.  My personal preference when carrying IWB is a leather holster due to its flexibility and long term comfort.  My experience with Kydex IWBs has been poor, as most models I have tried have a tendency to “taco” (the Kydex is so thin that when the weapon is drawn, the tension of the belt bends the holster in on itself, making re-holster difficult).  Kydex is also likely to be more uncomfortable against the skin.  As for nylon/fabric holsters, the quality is going to vary greatly as the market is flooded with dozens of cheap fabric holsters that are little more than sewn pockets that offer no retention at all.  It’s also important to note that I have yet to see a fabric IWB holster that does not “taco” when the weapon is drawn.

Avoid fabric holsters.

The next general consideration is the attachment method.  Popular options for IWB include; belt loops, J-hooks and simple clips.  The belt clip is the weakest option of the three and most likely to fail, they also have a tendency to have a weak purchase on your belt line and come out with the gun upon draw.  The J-hook allows the holster to be concealed deeper into the belt line, which makes them a good choice for concealment.  J-hooks are found on Kydex and hybrid holsters.  Finally, belt loops are just as reliable as J-hooks, though will by design carry the holster higher in the belt line.  Now, the chosen attachment method can also influence positioning of the weapon on the body.  A belt loop style can, depending on body type, be worn as far forward or rear as you like, whereas a J-hook style may limit positioning as it sits deeper in the waistline.

Positioning of the IWB is the final consideration.  If you carry IWB occasionally but normally prefer OWB, its best to carry inside the waistband in the same general location where your OWB holster would sit.  This reinforces repetitious memory and maintains as much continuity with practices skills as possible.  If this isn’t possible, or if IWB will be your main carry method, holster positioning should be chosen based on efficiency.   The same bio-mechanical efficiency that applies to the shoulder holster also applies to IWB.  If you carry at the small of the back (SOB) for example, your draw will require a sweeping arc and rotation of the wrist.  A draw from this location will also include incidental muzzling of unintended targets, though not nearly as grievous as a shoulder holster.  SOB carry has a printing concern that is likely to be exaggerated in light clothing and any bending forward at the waist.  Carry on the hip, or just rear of the hip instead will allow for greater efficiency and concealment in appropriate clothing.  Having discussed the general carry considerations, we can look at our three popular IWB holster types.

Handgun holster selection II: how will you carry? photo

Straight cant

Just like its OWB cousin, the straight cant holster points the muzzle of the weapon directly towards the deck.  This style is designed to be worn more or less in the same location as a hip holster, though it can be moved forward or rear of the hip.  Doing so may complicate the draw, slightly forcing a bend at the waist.  The straight cant style does present some concealment issues if worn at the hip as it places the grip of the weapon more-or-less on the same plane as the belt line and this allows he cover clothing to bunch above the weapon and fall between the grip and the body.  This can be corrected by adjusting the holster off the hip where the clothing is usually looser and not as likely to cling to the body.  This solution isn’t a blanket fix but may work depending on your body type.  The advantages to straight cant carry at the hip is in the draw.  A draw from concealment is going to be slower than from unconcealed.  Likewise, a draw from an IWB holster has a good chance of being slower than OWB because the weapon is held closer to the body and the primary hand must first wedge between weapon and body before the draw.  Because hip carry is more biomechanically efficient than other methods, it provides a faster draw potential.

Canted

The canted style of IWB holster offers more placement options in the beltline, and some with better concealment.  By angling the weapon, the grip does not sit parallel to the beltline and will not have as high of a tendency to print on slimmer body types.  These holsters are common in 5 to 20 degree cants and are usually canted based on where the holster is recommended for carry.  A SOB holster will have a more aggressive cant than one intended for rear-of-hip-carry.  When it comes to choosing a canted holster, its best to get an idea of where the weapon will be carried and how likely that location is to interact with the world around you.  A SOB holster, for example, will make your choice in seating a bit tricky.  There is nothing like the bruise on the back from wearing an SOB holster and then sitting in a hard backed chair for a few hours.

For canted (and IWB in general, of course) low quality holsters should be avoided altogether.  With shoddy design and materials, some holsters will have a tendency to let the gun sit too low in the beltline and the rear sights can hook on the pants or belt, making an immediate draw a problem.  Canted fabric may also drag against the front sight on the draw, or be so pliable that it grabs the front sight upon draw and causes a tug o’ war in your pants.  No bueno.

The final popular IWB method is appendix carry.  Essentially this is where the weapon is carried in the natural pocket of the body between the thigh and the groin with the muzzle generally pointed towards the deck, however I have seen appendix carry holsters with a 5-15 degree cant or more.

Now, take a deep breath if this is your chosen method of carry.

Appendix carry is unsafe and stupid; it is literally a bad idea wrapped around a gun.  Let me qualify that statement.  With appendix carry, the weapon is muzzling your femoral artery and you genitals.  Where a gunshot wound to the latter may be life (and sex) changing, a gunshot wound to the former has a high probability of killing you dead.  For those with little or no knowledge of anatomy, the appendix carry are of the body houses the lateral pelvis, hips, genitals, bladder, lower intestines, colon, and the aorta (which branches into the left/right femoral) as well as some other things that don’t react well to gunfire.  All things considered, I don’t want to be shot in any of them, especially with my own weapon.

Regardless of the holster type or design, the weapon is carried in an area of the body where ANY sitting or bending at the waist is going to muzzle the body as the legs bend up towards the torso to sit, or the torso down to bend over.  Before I go any further, you may believe that you are safe enough with appendix carry and it’s just fine for you.  Sorry, no.  Safety should never be violated for the sake of better concealment or comfort, nor should it be ignored simply because someone believes they are proficient enough to avoid a negligent discharge.  Appendix carry is the only method of carry that intentionally and knowingly muzzles the body and you should not like that. Ever.

As to the efficiency of appendix carry, there is no advantage save better concealment.  A draw from the hip is demonstrably faster.  In appendix, the weapon is drawn from near center line of the body and must be pushed either away (towards the target) or brought past the primary hand hip (to the side) before the weapon can be fired in close contact.  If the weapon is fired from centerline immediately upon clearing the holster, the slide will impact the body and runs a high risk of malfunction.  Add to that, the weapon essentially clears the holster sideways and must be rotated before the sights can be used, which delays the first aimed round.  The lag between appendix carry and hip carry is minimal, literally fractions of a second, though we must obviously keep in mind that we carry a handgun for self-defense from an unexpected attack.  Those fractions of a second may be the difference between winning a gunfight and losing your life.

The final issue with appendix is drawing from less-than-ideal or austere shooting positions.  Drawing from the fetal or prone or for shooters with more girth, seated or even supine can be highly difficult.  Under stress these complications have a real chance of causing a negligent discharge.

A word on exposed “open” carry

Many states allow the exposed carry of a weapon either in conjunction with or in lieu of a concealed carry permit for the non LEO citizen.  Often when I see someone carrying exposed, they are doing so in a holster that offers zero retention (Fobus holsters come to mind) or are carrying in such a way as to display the weapon needlessly.  I applaud the responsible carry of a weapon by any citizen.  The key word there is responsible.  Look, just because you can do something doesn’t mean you should.  One only has to look at the FBI’s Law Enforcement Officers Killed and Assaulted annual report to see how many LEOs lose their lives every year after being shot with their own weapon.  Why do I mention that?  Because most LEOS open carry, often in a level II or higher holster.  They receive hours of weapon retention training in the academy and hundreds of more hours throughout their career.  They are taught how to stand to keep the weapon out of reach, how to recognize target glances towards their weapon, and how to prevent their weapon from being taken from them…and officers are still killed with their sidearms.  A LEO of course goes places and interacts with people the average citizen doesn’t so their risk for having their weapon used against them is higher, though the comparison is apt nonetheless.

Any confrontation, argument, disagreement or chance encounter you have in the public has at least one weapon present, and if it is exposed, all parties involved know it is there.  If you choose to open carry in a friction retention or even a level I holster, you are significantly increasing your chances of being killed with your own gun.  Certainly it is your right.  So if you are going to exercise it, carry in a level II or higher and seek professional training in weapon retention.  If you aren’t willing to do this, please cover it up (legally, or course).  Personally and professionally, I would rather not see someone open carry simply because they can; it’s foolish and the sort of machismo posturing the pro-gun community does not need.  Thousands of people conceal carry every day without a single issue. If you have the option, you should too.

In the end when it comes time to choose your first holster or your next holster or just to rethink your current holster, choose your holster based on its safety, usefulness and comfort.  Choose based on your occupation or common carry preferences and always, always train with the holster you carry.  Leg rigs are Gucci, chest carry is Gucci, but it does you little benefit to train with either if the only time you carry that way is on the range.

We don’t go to the range to learn how to go to the range.  We go to train for real life.

This has been a semi-comprehensive look at holster types and methods of carry, but by no means is it exhaustive.  Of any carry method or material, a great deal can (and has) been written.  I am only one professional voice in a field of my peers, so I encourage you to do more research.  Should you disagree with anything written here or want more advice on a specific topic, feel free to email me and we’ll discuss. - The Prepper Journal

Respectfully,

Aaron Cowan, Sage Dynamics


How to Defend Yourself with a Pistol from Inside Your Car

$
0
0

How to Defend Yourself with a Pistol from Inside Your Car

By Bruce N. Eimer

When you are entering and exiting your motor vehicle, you are a prime target for a violent or armed assault.

This is also true when you are just sitting in your vehicle, including when you are stopped at a light or in traffic. Less likely, you can even become a target while you are driving. Predators look for victims who are distracted, otherwise preoccupied or trapped, and all of these apply in all of the above vehicular situations. This is compounded if you are a senior citizen, as we elderly fall into a “more often picked by predators” category.

It is therefore necessary to develop certain proactive habits to avoid becoming a victim. The first rule is: Have a gun. The second rule is: Make sure your gun is instantly accessible to you. The third rule: Remain aware of your surroundings. The fourth rule is: Be prepared and ready to do whatever you have to do to prevail if assaulted.

Have a gun

Many of us routinely carry a pocket pistol or small-frame snub nose revolver. Such a handgun in trained hands can do the job at bad breath distances when called upon. However, if you are at the wheel and someone begins shooting at you from the street or in a drive-by, will you be able to deliver precision shots with the little gun? The answer is no.

Keeping your gun in your glove compartment while you are driving is a bad idea, since it probably will not offer instant access.

For one, little guns are difficult to shoot precisely beyond bad breath distances, especially under stress. Secondly, you may have to shoot through your car windows, and you will need bullets that have adequate penetration. Therefore, for serious armed self-defense at the wheel, you need to carry a substantial defensive handgun. Medium to large frame .357 Magnum and .38 Special revolvers with heft, such as Smith and Wesson K, L, and N frames, stoked with .38 Special +P ammunition are a good option, as long as you practice defensive shooting with your revolver of choice.

If you want to be prepared, then, in addition to standard square range marksmanship practice, your practice sessions should include shooting from launching platforms that duplicate those you will be in if the balloon goes up (such as in an unavoidable road rage attack) while you are in your motor vehicle. I am talking about shooting from close quarter, compressed retention positions.

If you are not driving, and thus can take your hands off the steering wheel, a compressed, right-handed Weaver position is what applies for two-handed shooting out the window to your left. For shooting to your right out the passenger window, one-handed shooting with your right hand is what applies. If you are driving, your shooting techniques need to be modified since you must retain control of your steering wheel. I will address this situation below.

Viable pistols. Viable semi-automatic pistols for vehicular self-defense are those that you can handle with precision: Glock, Smith and Wesson M&P, Sig Sauer (9mm and greater in caliber), HK, Ruger semi-autos (9mm and greater in caliber), Springfield XD, Kahr (9mm and greater in caliber), and 1911 platform pistols fit the bill if you have chosen one that you can handle well.

Instant access

If you carry a gun in your pants pocket, the problem is that your carry gun will not be easily accessible when you are seated at the wheel. Since the last thing you need is to get capped by a bad guy while you have your hand in your pocket, you need to decide how you are going to tote your pocket piece when you are in the driver’s seat. What follows also applies to bigger, non-pocket carry guns such as those mentioned above.

One option is to keep your handgun next to you on the passenger seat (as long as no one is sitting there!), under a piece of clothing, a book, or something else that will stay put over your gun.

Keeping your gun in your glove compartment while you are driving is a bad idea, since it probably will not offer instant access. If you have a middle console compartment that your firearm will easily fit in, that could be a good option.

The challenge is to avoid engagements if at all possible, but if avoidance is not possible, to win the fight that you cannot avoid.

A third option is to carry on your body in an accessible location, such as your appendix or in the cross draw position. Think about an easy on/easy off belt slide or inside the waist band holster (IWB). An IWB, however, may be a tight fit if you have a big belly.

armed-senior-citizen-most-violent-crimes

Most violent criminals are not afraid of the gun, but they are afraid of the resolute person behind the gun.

Another option is a shoulder holster. It keeps the handgun where you need it when you are seated at the wheel; that is, under your non-dominant armpit so it can be accessed by your strong hand. Still another viable option is an ankle holster. It offers excellent accessibility when you are seated, at the wheel or otherwise.

When I am just carrying a small J-frame snubby in a #3 nylon Uncle Mike’s pocket holster or the equivalent, I stick the holstered revolver inside my waist band at around the 11 o’clock position when I am driving. Just before or after I exit my vehicle, I transfer the holstered revolver into a pants or jacket pocket.

Remain aware of your surroundings

You must remain aware of your surroundings. Parking lots and driveways are dangerous. You mustn’t let your guard down. In traffic, avoid letting yourself get trapped in between other vehicles such that you cannot find a path of fast egress, should that become necessary. Don’t tailgate. Leave enough room between you and the vehicle in front of you so that you can drive around that vehicle if you have to. As a defensive driver, you should be doing this anyway. You should be anticipating the moves of the vehicles around you.

The same applies when you are stopped at a light or in traffic. Apply the same defensive driving frame of mind and level of awareness. Do not let anyone creep up on you, either on foot, on a bicycle, on a motorcycle, or in any other type of motor vehicle. Make sure you see them approaching and have a plan. Always be prepared to do something, but know what you are going to do!

Make the surprise be on the stranger. If the surprise is on you, it is no joke. The late, great Col. Jeff Cooper, in his book, Principles of Personal Defense, described the Xs and Os game. You give yourself an X if you notice people who breach your 360 degree environment before they notice you. You give yourself an O if they notice you first and surprise you. However, there are no Xs and Os in real life on the street, where an O (the first letter of the word Offed) spells game over, which could mean you’re dead. So, maintain the defensive driving mindset whenever you are up and about, and have a plan.

Remember that action is always faster than reaction. Therefore, if you want to stay alive and in the game, you need to have the shortest possible reaction time if you are assaulted. The only way this is possible is to train for the worst possible eventuality, and to stay awake and alert not only at the wheel, but also when you are entering and exiting your vehicle. These are dangerous times, and there is no time to slack off on your due vigilance.

Be prepared and ready to do whatever you have to do to prevail if assaulted

A shoulder holster is an excellent carry rig for driving. But if you have to present your firearm, make sure to not cover your support arm.

A shoulder holster is an excellent carry rig for driving. But if you have to present your firearm, make sure to not cover your support arm.

An armed assault while you are driving can happen in several ways. For one, you could be shot at in a drive-by while you are driving. In such an instance, your first course of action should be to drop back out of the line of incoming fire by slamming on your brakes.

If you have to return fire, you must be capable of making precision hits with your handgun. You will be glad if you have the right handgun in a substantial caliber that you can handle, as discussed above. Little bullets, such as in .380 caliber and smaller, do not have the penetration power you will need.

You should be capable of shooting accurately from various sitting positions. When seconds count, you may have to shoot through one of your door windows or even your windshield. You can do this and still get precision shots if you have the right handgun and are skilled with it. Recognize that we are talking about close distances, as the vehicle carrying your armed assailants will be near your vehicle.

If the armed assault while you are driving is from a vehicle on your left, and you are still in the line of fire after dropping back, you will need to shoot back with your right hand. To do so, you will have to hold the steering wheel with your left hand and cross over the back of your left arm with your right hand (which will be gripping the gun). You will need to shoot one handed and make sure not to “laser” your left arm. You will need to bring the gun up to eye level and acquire a flash sight picture, or use the silhouette of the gun to aim.

This is a kind of one-handed Weaver position, which is actually similar to the Harries flashlight technique, except you will not be pressing the backs of your wrists together. You will be shooting one handed. It will be awkward! This technique needs to be practiced. Shooting moving targets is different than shooting stationary ones. As with shooting sporting clays from left to right or right to left, you need to lead your target a slight bit by shooting slightly in front of your moving target.

When shooting in or around vehicles, you may need to use unfamiliar or even awkward shooting positions. Here, the shooter steadies the back of her hand on the car’s frame to help maintain her accuracy.

When shooting in or around vehicles, you may need to use unfamiliar or even awkward shooting positions. Here, the shooter steadies the back of her hand on the car’s frame to help maintain her accuracy.

If the assault is from a vehicle on your right, you will also need to default to your right hand. However, in this case, you will be shooting one handed to somewhere within your one to four o’clock direction, depending on the location of the incoming fire. Thus, you will not be crossing over your arm which is attached to the wheel! You will need to extend your right hand to aim at your assailants on the right.

If the attack is from a vehicle in front of you, your options are to press your pedal to the metal and drive right into your assailants or to stop your vehicle and low crawl out the passenger door so you can return fire from the cover of your engine block and flank your assailants. Your adrenaline will be pumping very hard. Your survival will be at stake.

Whatever you do, do not just sit there! You need to keep moving. A moving target is much less likely to be hit. If the attack is from a vehicle to your rear and bullets are flying your way, you will definitely need to make evasive maneuvers with your vehicle to find a better position.

When shooting through the driver’s window, you’ll need to be able to make precise hits in a seated compressed Weaver position.

When shooting through the driver’s window, you’ll need to be able to make precise hits in a seated compressed Weaver position.

If you are stopped in traffic or at a red light and you are assaulted, you should have seen it coming! In any event, drive away if you can. If you cannot, you must fight. Always be prepared to engage and fight, because you just might have to!

If you are approached by an assailant on foot, look for a way to distract your assailant to give you time to get away. It is almost always better, in civilian life, to find an alternative to engagement. Therefore, be prepared to issue strong commands to a stranger who approaches your vehicle on foot. Practice verbalizing commands confidently so that they become subconscious tape loops. For example: Sorry sir. I cannot help you … I said I cannot help you! Get away from my vehicle NOW! … I said LEAVE NOW! LEAVE ME ALONE! … DROP YOUR WEAPON! DON’T MOVE.

Hopefully, you can de-escalate the situation before it gets to, Drop your weapon! Don’t move, because at that point you had better have drawn down on your assailant! The assailant has a deadly weapon and your life is threatened.

Conclusion

Have I ever been in any engagement situation such as those I have described above? The answer is no‑and hopefully I never will. However, the goal is to stay alive, and therefore, we do need to think about these things, but we need to do more than just think and visualize. We need to prepare physically through focused practice on a range where we can run drills that allow us to develop the relevant skills. This I have done, and the training is very eye opening.

You can shoot through your windshield if you have no other option. But you had better have enough gun!

You realize that you really have to work outside of your comfort zone to train to prevail in an armed confrontation and survive. However, if the balloon goes up, as they say, the whole event will be outside of your comfort zone. Assaults don’t happen when it is convenient for you to defend yourself!

The challenge is to avoid engagements if at all possible, but if avoidance is not possible, to win the fight that you cannot avoid. Winning means getting to go home. If a bad guy chooses to threaten your life, he has made a choice and you must choose as well—to prevail and survive, or to lose the fight and die. We must do whatever is necessary to go home as planned. - The Prepper Journal

Read the original article


How to Save Money Every Time You Shoot

$
0
0

How to Save Money Every Time You Shoot

By Guest Contributor

Going to the range and shooting does different things for different people.  A vast majority of the time (it should be always) we go to the range with the intention of keeping those perishable shooting skills frosty and at an increased level of readiness.  But there are those times where we just want to burn off some steam and destroy something without the threat of being arrested.  There’s nothing like making small explosions happen repeatedly, well unless you’re a SEAL or on an EOD team then you get to make ginormous explosions all the time and save the free world from terrorists and pirates.  For me shooting is simply Zen.  It sounds ridiculous to some people, but no matter what’s going on around me I’m in control of my physical movements and mental process as I manipulate that trigger to the rear and make my gun do what it was designed to do.  No matter if I’m shooting slow aimed fire or shooting controlled pairs, I’m calm.

Nevertheless we all shoot differently, move differently, and think differently.  But when we go to the range there is one thing that pretty much no one can avoid.  The cost of ammo!  Good God the only thing that rivals gas prices today is how the price of ammo has increased exponentially.  Unless you produce your own ammo, have a professional shooting contract, or you’re the CEO of Winchester, Federal, or Hornady ammunition companies, then ammo can put a fat dent in your wallet.  I know there are a lot of you out there who get the old “hairy eyeball” from the old lady when you come back from a few hours of shooting because they know you spent some cash.  For those women who get the hairy eyeball from your man….well all I have to say is why the hell wasn’t he shooting too and we know whose wearing the pants!  Just kidding…kind of.  Anyways don’t let the cost of ammo cut back on your training.  There is relief and that comes in the form of a .22LR pistol or rifle.  The .22 is the most popular and widely produced cartridge in the world and it’s the cheapest.  You can literally shoot all day for less than $10.  Most major ammunition websites sell .22LR in boxes of 500 rounds anywhere from $20 to $40.  It all depends on the grain that you shoot.  Plus buying a .22LR if you don’t already own one is an inexpensive venture as well.

The primary reason I decided to write this specific article was because I recently purchased a .22LR conversion kit for my Sig Sauer P229R-DAK (chambered in .40S&W).  The kit, made by Sig, comes with the entire pistol top end (barrel, slide, spring and spring guide) and one magazine all for around $300.  All you have to do is field strip your Sig and assemble the new top end and you’re shooting .22LR.  The coolest thing is that since you’re shooting with the same receiver the trigger operation and poundage required to manipulate the trigger is exactly the same as shooting .40.  The only difference is that it’s much quieter and the recoil is substantially less.  All the fundamentals of shooting are the same.  If you forgot what those fundamentals are and need a refresher, let me direct you to Chris’ articles on the “7 Habits of Highly Effective Shooters”.  He has also authored separate articles devoted to each of the seven habits.  I keep printed copies of these articles in my range bag so when people ask, “how do I shoot like that”, because my shot group is tighter at 25 yards than theirs at 5 yards, I give them some advice but give them the articles and just tell them to share them along the way.  But I love throwing that conversion kit on my Sig and blasting off .22 rounds.  Many major firearms manufacturers produce .22 conversion kits for the larger caliber weapons they produce.  The other day at the range I saw a guy shooting his Kimber 1911 (.45 ACP) for a few mags then he threw on Kimber’s .22LR conversion for it and started throwing .22LR downrange.

So if you don’t already have one get yourself a .22LR weapon and go to town.  They are so much fun to shoot and you just can’t beat the cost.  The seven fundamentals of shooting are exactly the same no matter what gun or what caliber you’re shooting.  I don’t care if you’re shooting a .22LR target pistol or a .50 DE pistol, it’s the same…..well okay one’s heavier than the other but you know what I mean.  Owning and shooting a .22LR will bring your shooting skill set to the next level and cost less than a lunch or that foofoo coffee drink you buy every morning.  I mean when’s the last time you spent more on gas to get to the range than on ammo?  Do your research on .22LRs just like you would with any other gun and buy the one you want and enjoy the shooting experience.  Plus when the Zombie Apocalypse goes down you’re likely to run across .22LR ammo more than any other and you can carry a ton of it! – The Prepper Journal

This article appears courtesy of PJ at Center Mass Group

Read the original article


How to Select the Best Handgun for Home Defense

$
0
0

How to Select the Best Handgun for Home Defense

By P. Henry

As preppers we routinely discuss the need to have firearms for home security. Logically, one of the next questions revolves around how to select the best handgun for home defense. You may know that you need a handgun or someone is telling you that you need to get a handgun to defend your home, but if you have never even held a handgun, how are you supposed to know what to purchase? This issue isn’t constrained to little old ladies or fearful women; men have a lot of questions too. In each case, it is easy to make purchase decisions that don’t take into account a lot of variables that could mean the difference between finding the best handgun for home defense and some bloated monstrosity your brother recommends.

Not to pick on your brother, but there are a lot of considerations to take into account if you want to get the best handgun for you. I am not talking about the best handgun in the world although there may be preppers who comment below about a certain make or model or caliber and the inherent strengths of their choice. Buying a handgun for home defense is something that you need to think about if your goal is to ensure you have the best tool that is going to help you keep your family or yourself safe. Before we can even begin talking about which gun you need, let’s start by asking yourself a few questions.

What do you need this handgun for?

Handguns are a common choice for home defense

Handguns are a common choice for home defense

That seems like silly question but in reality; you need to ask this first above all others. If you ask me why do I want a handgun, I would answer that I want a handgun so that I can use it to defend myself or my family from someone who intends to do me harm. I think this is a fairly normal answer, but there are other reasons people buy handguns. Some people purchase handguns because they simply like the fact of owning a gun. You see Angelina Jolie on the screen wasting bad guys with a big hand cannon and you say to yourself, I gotta get one of those! I don’t think there is anything wrong with that necessarily as long as you above all things use the firearm in a safe and responsible manner.

Knowing why you are purchasing the handgun is an important question because it can affect other decisions you have to make. It is also important that you understand the gravity of making a purchase like this. If your intent is to protect your home, have you seriously considered the possibility that you may have to shoot someone to stop violence from happening to yourself or a member of your family? If you are not willing to shoot someone then maybe you should make another choice.

The purpose of your handgun should decide some of the characteristics of the eventual gun you buy. For instance, if you wanted to buy a handgun for defending your home that can influence the caliber, the style and even the ammunition you would load into it.

Where are you going to keep/carry it?

The next question is where are you going to carry this handgun. Is your intent to carry this handgun concealed with you every day or do you plan to keep this at home for home defense? As you can imagine, the method of carrying your firearm should influence what you are purchasing. If this is going to be a concealed carry weapon, that will determine size first and how you secure it (holster). If this is going to be a bedside gun, are you going to need a safe with biometrics to prevent access? Do you plan on locking this in another location like a larger safe? The answer to the first question might dictate some of this.

If you are looking for a handgun for home defense, how do you envision needing to use it? Do you plan to run to your bedroom if someone kicks down the door or will you have this handgun hidden somewhere that you hope you can access?

What size/type do you need?

OK, so we have determined what you plan to use the handgun for and that is home defense. This entails the possibility of shooting someone. Again, this assumes you have carefully considered if you are willing to take another life to defend your family. If you aren’t ready to do that, then I would reconsider purchasing a firearm in the first place. Assuming you are ready to pull the trigger if needed, we move on to more specific questions.

There will be a debate over caliber that nobody will ever win. I can tell you my opinions, but you need to come to your own decision on the caliber you need. The debate with handgun calibers is usually centered around stopping power. Stopping power is really just how much force a given bullet will hit someone with. So, the logical thought is the larger the caliber bullet, the more stopping power, the better the round is for home defense. It isn’t that simple though.

For handguns, there are some common calibers that most people use. The common calibers for handguns would be .9mm ,357, .40 and .45. There are others, but these are the most common.  The larger the bullet, the more mass will hit your target, but there are hundreds of different load configurations that make the actual act of figuring out which round is the best difficult. To get a sample of some of the options, you can look at this chart on Chuck Hawks site.

If I am shooting at someone in my home I want that bullet to do the most damage possible so that I can stop the bad guy as quickly as possible. For me that means a larger bullet with a little more kick. My preferred home defense caliber is .45 with hollow point bullets. Is that the perfect round choice for everyone? Not at all.

With a larger caliber you have some what higher recoil on the handgun when you shoot it. With greater penetration, you may have to worry about rounds going through walls and injuring someone that isn’t even in the same room as you. With 45’s you will always have less capacity in the magazine, because the rounds take up more room. With a .9 mm for example you can probably hold double the rounds. There are trade-offs though.

What to choose? I would say that you need to shoot several different rounds before you make a decision. Your firearm should be the best for you because you can use it better than another. For example, I have a Glock .9mm that I thought would be perfect for my wife but time after time at the range it would mis-fire for her. There wasn’t anything wrong with the pistol because I would shoot it without a single malfunction. I just assumed the smaller caliber/less recoil of the Glock would be better for her because she was a woman.

Her favorite is my old 1911.45 though because it feels “right” in her hands and she can shoot it very accurately without ever missing a shot.

Trying it on for size

Which brings me to my next point.  If you are looking for the best handgun for home defense, you need to try several out before you purchase. Almost any gun store with a range has a rental program where you can actually shoot several different firearms to see which one feels the best. If this is your first purchase I would never recommend buying a handgun without firing it first.

You are looking for several things when you are trying out a handgun. First, does the size match your intended carry method above? Next, does it fit in your hand correctly? A lot of gun manufacturers offer replaceable grip extensions now to augment the grip. The handgun should feel perfectly mated to the inside of your palm. How does it feel when you shoot it? Shooting a handgun should be a simple extension of squeezing the trigger. There will be a little recoil of course but it shouldn’t hurt. You should also be able to generally hit what you are aiming for. Don’t expect perfection if this is your first time shooting, but different guns shoot differently. Going back to the story of my wife; she was much more accurate with the .45 than she was with the .9mm and that has nothing to do with caliber. The .45 just fit her better.

Bells and Whistles

There are a lot of accessories you can purchase for a handgun. There are weapons lights that will illuminate what you are shooting at. You can even find integrated laser sights that when properly aligned will shine a laser pinpoint right where your bullet will land giving you an easy heads up way of pointing without necessarily looking down the sights on top of the weapon. There are even custom parts to change the appearance of your handgun. I would hold off on all of this until you have a gun that is working perfectly for you. There will be time to pimp your handgun later.

Practice Makes Perfect

Of course, once you have purchased that handgun you have to practice with it. You can’t expect to be very proficient with a firearm if you never pick it up. Even though the price of ammo is a lot higher than it used to be practicing with your handgun is vital to ensuring that you will be able to use it for the reason you purchased it. When your life is on the line you want to make sure that the handgun you purchased for home defense isn’t an expensive paper weight.

Let me know in the comments below if you have any other suggestions on how you found your best handgun. – The Prepper Journal


Four Survival Guns

$
0
0

top-4-survival-guns

By Ken Jorgustin

Owning a gun, or a variety of guns, is not only your right, but is a core element to ultimate personal protection and a practical tool for rural survival living. Gun ownership compliments the lifestyle of those who live a life of self sufficiency. Although there are some who are wary of guns, and there are parts of the world where gun ownership is outright banned, owning a gun is really just like owning a tool to compliment all the other tools that you have in your ‘kit’.

I’m re-posting this original 2010 article for comment, because it’s always a popular and often widely debated subject filled with near infinite opinions…

I recently received an email from Kent, a reader in Alaska, who already lives a lifestyle where hunting, fishing, gathering, gardening, canning, etc., is common and simply part of his and his wife’s current way of life. He brought up the notion of how firearms are integral to rural survival living and listed some practical recommendations including the four survival guns he would choose.

Kent from Alaska writes:

If I had to pick one firearm only, it would be a .22 rifle. Even a good one is inexpensive, as guns go, and so is the ammo. It is good for small game, adequate for home defense and medium game, and in a pinch one could take a deer or even a moose with a well-placed shot.

If I could pick a second, a 12-ga. shotgun (pump action) would be it. It can fire a variety of loads for small, medium, and large game – bird-shot to buckshot/slugs. It is the best home defense weapon there is.

Some might argue that the shotgun should be the first weapon and the .22 the second… but the .22 is more accurate at longer ranges and if your survival depended on taking that marmot way over there, I wouldn’t want a shotgun.

For a third, it’d be a tossup between a revolver and a scoped rifle. It would sort of matter on where one lived. In a rural area, the rifle would be handier for game like pig, deer, antelope, elk, etc. As far as general use, it is hard to go wrong with a .30-06 in the lower 48. Here in Alaska, with bigger more-dangerous game to deal with, a .338 or .375 would be the way to go.

In an urban environment, the revolver would probably be handier. A .357 magnum or .41 magnum is excellent for home defense. Don’t go for a little short-barreled pocket gun. Get a nice, solid, 6″-or-better-barreled pistol. With a scope, it can also be used for hunting.

Best bet, get all 4 types…

While fancy semi-automatic weapons with large clips may be popular survival weapons in the movies, simple bolt- or lever-action rifles, pump shotguns, and the ever-reliable revolver are far less likely to jam, misfire, or break.

Based on reading lots of opinion prior to posting this, it seemed to me that the following 4 guns were often near the top of the list with regards to tools for survival.

top-4-survival-guns

List of the top 4 survival guns?

1. Glock 19 (9mm) handgun, Caliber is extremely common and ammunition will be easiest to obtain. Very reliable, accurate, and highly owned pistol for all around use.

2. Remington 870 (12 gauge) shotgun, Highly customizable and well respected reliable pump action shotgun.

3. Ruger 10/22 (.22 LR), Well renown and respected all-around 22 that is highly configurable, accurate, and reliable.

4. AR-15 (.223/5.56x45mm) rifle.

By the way, the author of the popular book, Boston’s Gun Bible, suggests the following four guns (with caveats)

Glock 30 (.45ACP) handgun

Remington 870 (12 gauge) shotgun

M14 (.308) semi-auto battle rifle

Marlin M70 Papoose (.22LR)

Source: Modern Survival Blog


Ammo Inventory Spreadsheet – Free Download

$
0
0

Ammo Inventory Spreadsheet – Free Download

Posted by P. Henry

As we Preppers do our thing of planning, prioritizing and eventually acquiring supplies, skills and knowledge at some point you might need a hand organizing everything you have. There might be one or two of you out there with a set up like the have in the picture for this post, but the rest of us need some help. For most people this is simple and if you are really anal retentive, you have colored charts, lists, binders and 3 x 5 cards to keep all of your supplies organized. That isn’t me.

For some things it is simple to keep most prepping items in one place. Food storage for example, has a pantry to go into and as long as we have and keep an organized pantry or other system so we know what we have, everything is fine. If I am running low on supplies I can go to the pantry, check my inventory levels and adjust as necessary. Or like this evening, I saw that a few new cans of soup had not been put away correctly and needed to find the right spot for them. OK, really who’s anal now?

Water storage is another easy one because that rarely changes or moves. I have several places where water is stored, but outside of rotating the stored water for fresh water every six months, we don’t need to keep as close an eye on that. Long term fuel storage is another one that is fairly easy.

There are some survival items that will get used like duct tape, medical supplies and camping/backpacking gear but most of these items are used frequently enough that I am purchasing more on a frequent basis, so again, keeping track isn’t that urgent because anything I would need multiples of, I usually already have or routinely pickup when I am out shopping for anything related to prepping.

When it comes to items like food and ammunition, we are generally looking to stock up on as much as we need and knowing where we are in that process takes a little organizational skill. For ammunition you need for that survival firearm, the easiest way to do this for me was to write everything down on a list and track how much I have on hand, what my desired quantities were, how far to my goals and how much money I would be looking to outlay to reach those goals. Additionally, I wanted to keep track of all of this because unlike food in the pantry, I have ammo all over the place.

The System

You can find inventory spreadsheets out on the internet, but I just quickly created my own one day after I got a wild hair and grabbed all of the ammo I had in various places and decided to count it. Up until that time, I would just buy a box or several hundred rounds of whatever calibers I had on hand, or had just purchased. I had a rough idea of how much I had, but nothing precise and I was worried that I might be buying the wrong things. It was time to track my ammo.

Excel is a great tool for keeping track of inventory.

Excel is a great tool for keeping track of inventory.

After I had a big pile of ammunition in various boxes and configurations weighing down my kitchen table, and sorting it into calibers (and smiling proudly) I started separating the handgun ammo into ball and hollow-point. Some spreadsheets go so far as to separate by manufacturer, but for me that wasn’t important. I simply wanted to know how much I needed to have and what was on hand. The Spreadsheet was pretty simple; I listed all of the caliber types I had, entered the quantity of each and created a column for what my goal was. For instance, my goal for each hand gun was to have 1000 rounds of ammo for each. I then created a simple formula to subtract the on hand count from the goal to give me a variance. When I did this for all my calibers, I could easily sort the spreadsheet on the variance column to see what I needed the most of. Now, when I go to the gun show, I know that I really need more .30-.06 ammo than 9 HP for example so I can make an informed purchase.

I also added some other fields like the average cost for a box so I would know how much cash (roughly) I was still looking to spend to meet my goals. The prices change all the time, so what is in the spreadsheet might not be accurate. Everything is open and you are free to change this as you see fit if you think this could help you.

The spreadsheet is on our Resources page in the “Downloads” section and if you have any lists you have created yourself and want to share, please let me know. – The Prepper Journal


Concealed Carry for the Petite Woman

$
0
0

Concealed Carry for the Petite Woman

Posted by Falia Leigh

Numerous factors must be just right in order for concealed carry to work well, and concealment can change daily depending on our clothes and activities. Gun size, on-body carry position, holster angle, and ride height are all things to consider, and just one problematic factor can be frustrating enough to discourage us from carrying. Since our bodies and gun preferences are all different, the CC method that works best for one person may not work for another; therefore, the more perspectives we can get from individuals similar to ourselves, the better.

As a petite 5-foot-4-inch female of 118 lbs who carries a gun everywhere she goes, I’ll be the first to admit that concealed carry can still be a headache on certain days, resulting in a pile of clothes, guns, and holsters. In addition, a lazy week and a change in eating habits can (and will) make my pants fit a bit more snugly than usual. What woman really wants to squeeze a gun anywhere inside her pants when they are feeling tight already?

Women’s clothes are often fitted to accentuate our curvy figures, and our miniscule pockets are only capable of holding dainty things. Most of us just want to wear what we want to wear, without making getting dressed another chore to add to the daily list. Thankfully, there are many holster options available today, even for petite women, because I sure wouldn’t carry a gun on my body daily if it were not both comfortable and concealable.

ankle holsterWomen definitely have an advantage with ankle holsters since they are very easy to access when wearing long skirts and dresses. One with both a calf strap and soft inner padding, such as this Galco Ankle Lite, provides both comfort and stability.

Along with the high number of holster options available for us to choose from, there are also a lot of places to position them around our bodies. INside-the-waistband (IWB), OUTside-the-waistband (OWB), shoulder, ankle, bra, pocket, thigh, appendix, and purse carry are the main CC methods that come to mind. Once you figure out where you can actually conceal on your body, then there are more choices to pick from. Leather, Kydex, hybrid leather/Kydex, and fabric holsters all vary in terms of comfort and retention. Numerous holster choices may be overwhelming, but there is no doubt in my mind that something will work for every licensed woman who wishes to conceal carry, if she is willing to spend some time going through her options and is truly determined to carry her gun on-body.

First things first, I recommend you decide which gun you most want to carry with you on a regular basis, and then try to make concealment work on your body with that gun. If you are unable to find a method of concealment (holster and body position) that works for that particular gun, then switching to a smaller gun can definitely help. A tiny .380 might conceal the best for all of us, but perhaps you’d actually prefer a slightly bigger (but still small) gun like a 9mm Glock 26 or a Ruger LC9. Gun selection is truly a matter of individual preference, and although very small guns conceal the best on my petite frame, other guns can conceal well too, depending on the season.

In the summer, I can only really conceal a .380 or a NAA mini .22 revolver on my body. In the winter, however, any gun can be concealed underneath heavy clothing. I’d prefer to carry my double-stack S&W M&P compact 9mm year-round, but with my small body size, I just can’t conceal it well enough with normal summer outfits. I’m not going to stop wearing shorts and tank tops in 90 degree weather in order to conceal my biggest gun, so I simply downsize to the smaller Ruger LCP or Kel-Tec P-3AT during those months.

Thigh holsterThigh holsters, like one from Clament Custom Leather, can work well for smaller women with lightweight guns, when worn under loose, knee-length skirts and dresses. When angled out the backside of the leg, they are less likely to rub when walking.

Once the weather starts cooling off, cover garments become much easier to incorporate back into daily wear, and it becomes a pleasure to carry the M&P again. Sweatshirts, jackets, vests, and sweaters are all excellent concealed carry helpers for those times of year when the temperature drops a bit. Even lightweight, sleeveless vests can be very helpful for concealment during the summer, although I’ve found darker colors to always conceal better than lighter ones.

I didn’t want to drastically alter my wardrobe to start carrying a gun, but being a new CC licensee was a great excuse to peruse eBay, thrift shops, and the mall, since I didn’t own many sleeveless vests or cover garments at the time. I wasn’t going to buy anything that I wouldn’t normally wear, so shopping for CC clothing was my own form of research. I asked myself, “What types of cover pieces could you add to your closet that you would still wear, even if you weren’t carrying a gun?”

Although I didn’t set out to change my clothing style, I will admit that finding a few select pieces sure did help with my concealment efforts. Having a few sleeveless vests in your wardrobe can make a huge difference, and shopping for new cover garments can be a true highlight of concealed carry. If you start out struggling with the concealment of your firearm, I highly recommend doing some shopping research of your own and not giving up until you find a few cover-ups that you’d be excited to wear any day of the week.

OWB holsterA long cover-garment is essential for OWB concealment, since you must cover both the gun and the holster. Concealing a mid-sized gun like this compact S&W M&P in an OWB holster can be hard for a petite woman, so switching to an IWB holster and/or a smaller gun can help.

Also, if you are like me and normally wear tighter pants that don’t allow for much wiggle room, definitely consider buying a few pairs that are one size up from what you normally wear, so that you can better experiment with IWB carry. I didn’t give into that for the longest time, but I’m so glad that I finally have because IWB holsters have become much more comfortable for me.

If you are going to spend the money on a concealed carry handgun, definitely consider CC clothing to be an investment to the cause—you may no longer have to leave your gun at home! You may even come to find that when you’re out shopping in the future, garments that are beneficial for concealed carry really jump out at you. Don’t forget that the ability to wear unique, feminine cover garments is one fun luxury of being a woman.

For my very first concealed carry gun, I chose a simple, lightweight revolver: the Ruger LCR. I experimented with all different types of holsters for that one gun, and of course I kept hitting walls. Some of my pants lacked belt loops, which ruled out all belt holsters. Others were very tight at the ankles, which ruled out any ankle carry. All dresses and most skirts did not work with a belt holster, and all of my pants pockets were too small for any gun. If you really want to carry your gun, however, persistence pays off. I have learned that on my body, with the types of fitted clothing I usually wear, different outfits work better with different types of holsters.

My wide-leg pants or long, floor-length skirts and dresses always favor an ankle holster, especially when they don’t have belt loops or the fit is too snug to accommodate a gun in the waistband. Knee-length skirts and dresses often work well with a thigh holster, as long as the gun being carried is small and lightweight. I have found, however, that skirts made of stiff, heavy fabrics can make drawing from the thigh holster more difficult, and skirts worn above the knee are often too short for a thigh holster to conceal adequately.

IWB holsterJean skirts often have belt loops, which means ‘belted IWB holsters’ can still be worn in the summer. For a woman who carries a small 380, an adjustable IWB holster, like this Crossbreed Minituck, may conceal very well underneath a loose tank top or T-shirts.

Instead of thigh carry for those skirts, an IWB holster can work much better. Depending on whether or not the skirt has belt loops, I use either a Crossbreed MiniTuck or a clip-less Remora holster, positioned low in the waistband for best concealment. Not only is an IWB holster my CC method of choice with shorter skirts, but it is also my main choice for shorts, pants or jeans, paired with a regular T-shirt, hooded sweatshirt, vest, or cover garment.

A gun can also be concealed outside the waistband if you are wearing a longer, heavier sweater or jacket, although OWB holsters are bulkier in general, making them harder to conceal. Very specific cover pieces, like a roomy winter coat or a dark colored vest, can work especially well for most CC methods, including OWB, shoulder, and pocket. However, since concealable clothing options for smaller women can be limited with both shoulder and pocket holsters, I still carry either IWB or OWB in the winter.

Sometimes a woman, petite or not, has no other option but to carry her gun in a purse or bag. For those occasions, it is beneficial to have a dedicated gun purse, with a separate compartment for your gun. As a fail-safe option for when I’m either running out the door or heading on a more adventurous trek, I conveniently holster my gun inside a Gun Tote’n Mamas shoulder pouch or a Disse Gear concealed carry bag. I’ve also recently discovered a unique, new bra-style holster called the “Flashbang” which is made for various small guns. It may work well with most female clothing, aside from dresses and sports bras, although I still have yet to try it.

OWB holstersA straight drop (neutral cant), as shown with this Crossbreed SnapSlide OWB, is meant to be worn directly on your side in the 3:00 or 9:00 position. This angle is great for the range, although it doesn’t conceal well on a petite woman. (bottom) A slight forward rake, or even a more “extreme” forward rake, as seen on this Lobo Gun Leather OWB, can conceal very well for a petite woman in the 4:00 position. This angle helps keep the grip of the gun from poking through a cover garment.

Most of the time, I truly prefer IWB carry, and the sweet spot on my small frame is always the 4 o’clock position, directly behind my strong-side (right) hip. If I so much as even think about small of the back or appendix carry with my slim build, however, lo and behold, quite the bulge appears! For some women, those positions might work, so don’t rule them out until you try them yourself. They just don’t conceal well with my particular physique.

I like to wear shorter tops and cover garments too, so the main highlight for me with an IWB holster is that you only have to conceal the gun and holster above your pant line, since most of the gun and holster is already concealed within your pants. With an OWB holster, however, you have to wear a longer shirt or cover-up, since you must cover not only the entire gun, but the entire holster as well.

With any IWB holster, both the ride height (depth of the holster and gun in your pants) and cant (degree angle or “rake” your gun is tilted at) will make or break your IWB concealment attempts. The Crossbreed SuperTuck was my first IWB holster, and I’m so glad it was because that specific holster is adjustable for both ride height and cant. An adjustable holster is beneficial, especially for those starting out, so you can figure out exactly how you need to position a holster on your own body for it to conceal.

For me, a lower ride height conceals best, since I often wear fitted tops. Also, a more extreme forward cant works the best for me, since that angle is least likely to allow the butt of a gun to stick out the back of my shirt.

clipless IWB holsterMany skirts lack the belt loops needed for waistband holsters, while others are too short for thigh holsters. A “clip-less” IWB holster with a tacky exterior surface, like this Remora No-Clip IWB, is a good option for a skirt that fits snug.

The versatility that different holster options provide is terrific and no single holster will work for all applications. With that being said, I’ve also come to believe that it is worth making small compromises in our wardrobe in order to carry a gun in the same position on most days. Since it is not a good idea to frequently switch your on-body carry location from day to day, picking a main style of clothing and preferred carry method is beneficial. If you wear a lot of long skirts, an ankle holster might be perfect for most days. If you prefer a lot of baggy hooded sweatshirts and T-shirts, an IWB holster might be the main way to go.

The problem is, if you constantly switch where you wear your holster, it may not be where you attempt to retrieve it from should you ever have to use it. It would be detrimental to forget where you are wearing your holster on the day that you need your gun, and you surely don’t ever want to fumble with getting it out. If you pick one or two carry methods for wearing your gun most of the time, then it will be easier to fit in plenty of crucial drawing and shooting practice at the range.

I am so grateful for the right to carry a concealed firearm for protection, and as CC permit holders, we should all respect the responsibility that entails. No matter which carry methods you choose, it is most important to be comfortable with your firearm and know how to handle it safely. – The Prepper Journal

 Read the original article on US Concealed Carry

[ Falia Leigh blogs online at the “Falia Freedom Journal,” http://www.faliaphotography.com. If you would like to see video demonstrations of the various carry methods described above, check out the author’s YouTube channel at www.youtube.com/faliaphotography ]


Gun Sight 101

$
0
0

gun-sight-101

By Ken Jorgustin

So having spent some time at the range recently with my new Smith & Wesson M&P45, I thought I would share a ‘back to basics’ tip that helped me get better on target after expending my first magazine with poor results…

It’s like any sport, skill, technique… we sometimes get distracted with the effects or experiences of something new, which sometimes leads to over-analyzing things, and once in awhile we lose sight of the basic fundamental techniques of what we are setting out to accomplish. In this instance, I was simply trying to hit a standard pistol target at 30 feet, ideally somewhere within the 6-inch diameter ‘black’ rings of the paper target. Heck… anywhere within the 10-inch target itself would be a good start… or even hitting the perimeter of the cardboard that is holding the target… which was where most of my first bullets went.

Admittedly though, this was a new pistol for me, and a larger caliber that I’ve not had before. I know, I know… excuses.

In any event, after some good-hearted teasing from a few of the other folks in the pistol house, we began to chat about the basic fundamentals of shooting straight, including the following two things, which got me back on my game…

1. Focus your eye on the front gun sight

2. Pay attention to your gun sight air gaps (lining up the dots)

While I knew that my grip and my stance was good, I had become more mentally focused on the fact that it was a new firearm, I was unfamiliar with the trigger pull/tension versus when it would fire, and I had even started to ‘anticipate’ the shot, which really makes for a problem.

On my second magazine, I settled down, and thought only of the fundamentals. I focused my dominant eye on the front gun site, while being fully aware of the slightly blurry rear sight and the blurry target itself.

As basic as it may sound (and be), the fact is that in order to shoot straight, or accurately at your intended target, you must pay attention to properly lining up the gun sight dots. Any slight misalignment WILL cause the bullet to travel either left, right, high, or low. The shorter the barrel of the gun, the more pronounced and extreme this will be. And naturally, the further away the target, the more these effects will apply.

I had some fun playing with my camera while getting a picture showing the alignment of the front and rear gun sights which illustrate the equal air gap and lining up of the front gun sight dot with the two rear dots. It doesn’t take much to get it misaligned… but once they are lined up, you will shoot straight… provided that your trigger pull doesn’t move the alignment and that you are gripping the gun properly. In any event, the image below gives you an idea. It shows the dots lined up in a row which gives you a proper vertical alignment, and it shows the center dot right in the middle with a slight air gap on each side.

front-rear-gun-sight-dot-alignmnet

The next picture shows the gun sight position which would cause a miss to the left.

gun-sight-shoots-left-of-target

The following picture shows the gun sight position which would cause a miss too high.

gun-sight-shoots-high-of-target

I know that it’s all super basic, but often times getting back to the basics and focusing on the fundamentals helps us improve or re-establish our skill. Besides… it gave me an excuse to play around with my Sony A65 camera.

Appreciate topics of survival, preparedness, risk awareness – or planning for disaster? Read our current articles on Modern Survival Blog


Firsthand Armed Citizen Experiences

$
0
0

armed-citizen-experiences

By Ken Jorgustin

Studies indicate that firearms are used more than 2-million times a year for personal protection. The following are firsthand experiences of armed citizens who displayed or used their firearm for personal protection…

Hazel Poole, 85, was at home playing with her puppy around 8:30 p.m. when there was a knock at the front door. Little did she know that she would open the door to two masked men wielding knives. Poole wasted no time and dashed to her bedroom where she kept her .38-cal. handgun. With confidence she pointed the gun at the men and ordered them to leave her home or she would shoot. Both men fled without hesitation. -The Star Press, Muncie, IN.

A man in his early 40s entered a nail salon at about 5:30 p.m. and began asking a female employee about purchasing diamonds. When the confused woman told the man she had no money to buy diamonds, he reached into his coat pocket and pulled out a pistol. When a customer getting her nails done saw what was happening, she reached into her purse and pulled out her own firearm. Upon seeing the woman’s gun, the man quickly fled the salon. -Casper Star-Tribune, Casper, WY.

Two men targeted the home of Jerry Stremovihtg, 62, and Kenneth Conley, 53, one evening. Conley was having a meal on the front porch when the two men approached him. They beat him and repeatedly used a taser to subdue him. After gaining entry to the home, the suspects entered Stremovihtg’s bedroom. Stremovihtg met the intruders with a .38-cal revolver. He fired several rounds causing them to flee the home. One suspect, a 35-year-old male, died in the front yard from a gunshot wound. -The Daytona Beach News-Journal, Holly Hill, FL

Gary Cherry was driving at approximately 8:30 a.m. when he noticed two vehicles on the side of the road. Cherry pulled over to help when he saw there was a man holding a woman to the ground face down and stabbing her repeatedly. Cherry, a concealed carry license holder, quickly retrieved his firearm and ordered the man to get on the ground as he dialed 9-1-1. Crystal Ward was traveling the same routed when she spotted Cherry holding the perpetrator at gunpoint at the side of the entrance ramp. Ward stopped to assist and discovered a crying baby boy in one of the vehicles. The suspect was later taken into custody and the victim was flown to a nearby hospital with multiple stab wounds. -Montgomery County Police Reporter, Plum Grove, TX

Two teenage boys were spotted by a neighbor as they loaded items from the cabin next door into a vehicle parked outside. The youths wore what appeared to be blood-spattered clothing. The neighbor retrieved a firearm and confronted the interlopers. They were held at gunpoint until police arrived. The teens had run away from a juvenile rehabilitation camp just two days before. They had broken into the cabin and brutally murdered the elderly couple staying there before the armed citizen was able to stop them. -The Kansas City Star, Springfield, MO

A man in his early 30s entered Armen’s House of Music one afternoon, looked around and left. He returned just a few minutes later with a wooden club and began attacking the owner’s wife, Sylvia Armen, who was working in the store at the time. The owner, Alfred Armen, heard the commotion and ran to his wife’s aid. He tried to defend his wife and fought with the suspect before shooting him to death. -WTAE.com, Bethel Park, PA

After confronting a man lurking in his front yard the previous morning, Clint Lowery called police a second time when the same man tried to gain entry by forcing open the door to his home. With his 2-year-old daughter sleeping inside, Lowery did what he had to do to ensure his family’s safety. Lowery met the intruder on the front porch with a 12-ga. shotgun and held him there until police arrived. -Peninsula Daily News, Port Angeles, WA

A pregnant Texas woman was home alone when she heard someone banging loudly on her front door. She didn’t answer the door. While the first suspect was banging on the front door a second was breaking in through the back door. The woman grabbed her husband’s .40 S&W handgun and called 911. When the intruders saw she was armed they fled to their car. -Gunssavelives.net, Palmview, TX

Richard Duffy, 48, and his son were watching TV when an intruder broke down their front door. After a brief altercation the intruder was fatally shot, according to a spokesman for the Maine Department of Public Safety. Another man waited in a car, but fled after he heard the gunshots. -TheBlaze.com, Rome, ME

At approximately 11 p.m., a resident responded to the sound of an intruder entering his home. A 21-year-old man had used a shovel to break through a back window and enter the residence. The resident retrieved a firearm and shot down a hallway toward the intruder. The intruder, who already had a long list of previous offenses, was struck and later pronounced dead. The homeowner was reportedly not injured during the home invasion. -The Post & Courier, Orangeburg, S.C.

A 56-year-old man heard the doorbell ringing at his home just before 1 p.m. When the homeowner failed to recognize the man outside his door, he ignored it. A few moments later, the suspect threw an object through a glass front door and entered the home. The homeowner responded to the sound and the two men struggled. The homeowner pulled out his handgun and fired twice, striking the intruder in the shoulder. A delivery truck driver saw the scuffle from outside, heard the shots and made the initial 9-1-1 call. The intruder was arrested after receiving medical treatment. -The Issaquah Press, Issaquah, WA

Four teens on a crime spree forced their way into the home of 72-year-old Morris Reaves. Two of the teens wore ski masks and one wielded a rifle. Reaves heard the break-in take place and met the youths with his own firearm. Reaves fired two shots at the intruders causing them to flee to a nearby car and drive away. The four suspects were later identified from images taken by Reaves’ security camera. They were each arrested and charged with one felony count of kidnapping, robbery with a dangerous weapon, conspiracy to commit burglary, breaking and entering a motor vehicle, larceny after breaking and entering, and misdemeanor assault by pointing a gun. The Charlotte Observer, Lenoir, NC

In the main-stream media, when we hear about firearms, they are always in a bad context. The media seemingly salivates over reporting horrible tragedies when there is a gun involved because it helps them to demonize the gun rather than the psychopath that fired the gun. I hope that the personal accounts listed above will shed some light on the beneficial uses of a firearm.

Consider this… Some of you may be living in a bubble whereby you may feel that you do not need to protect yourself with a firearm — because you have never had an experience with a dangerous threat and you do not expect one. You will simply dial 9-1-1 if you ever need to. Here’s the thing…

When you are jerked awake at 2 a.m. by glass shattering of the window breaking (or door being kicked in) while a burglar enters your home… will the police get to your bedside before the burglar might? – Modern Survival Blog


How to weatherproof your firearms

$
0
0

By Road Warrior

Here in the Northeast U.S., deer hunting season is upon us. In my family, that means getting gear ready for said hunting season. With us, WHAT we hunt with is as much a part of the hunt as scouting, planning, and getting out there. We’ll sit around and jaw about what we’re taking, why, new loads we’ve handloaded for the rifles, how they perform, trajectories, bullet designs, blah blah blah. It’s part of the tradition, and I look forward to it all year. However, once we’ve settled that, we get them ready for the season, and any inclement weather the firearms may have to be carried through. Since we all work through the week and Maine doesn’t allow hunting on Sundays, it generally means we only get out hunting 4 Saturdays during the month-long season, so we’re getting out, weather be damned!!

But what we do to our gear translates over nicely to how to set gear up and protect it for a SHTF emergency. Your gear has got to be ready to rumble, and can’t be bound up by corrosion brought on by summer humidity, winter snow, or dirt, driving rain.

What your gear will face

You know your area better than I do, so you’ll have to do your own figuring what will work best for your individual scenarios. If you live someplace in or near the Mojave desert, say in the Las Vegas area, dust, and dirt may be your biggest issues. In Florida, salt spray in the air and rampant humidity will be your enemies, and for us here in the northern US, we get the fun of crazy, unpredictable weather: snow, driving rain, humidity, extreme temperature variations. Each type of meteorological conditions will effect your firearms in different ways, and should be counter-acted accordingly. Even if the gun never leaves the house, moisture in the air and fingerprint/hand oils will attack your rifle just as readily as leaving it in the rain. So let’s square your gear away, shall we?

Rain/snow/humidity

Rain and snow can be a real bitch to guns. Water can and will run down and penetrate to every unseen surface of the gun, causing massive rust on metal and swelling and rotting wood (if your stocks are made of wood.) While gun oils will do a very decent job of repelling moisture, it often will then go where the oils aren’t and do its worst. So I prefer to mitigate that as much as possible with grease, applied thoroughly to areas that don’t get wiped down or dried when the gun comes back in from the weather.

I swear by R.I.G. (Rust Inhibiting Grease) as my grease of choice for hunting guns and anything that gets long-term storage. It goes a long way, and lasts forever, much like the cosmoline the military used to use for long-term storage. It’s cheap, and has worked well for years and years. If it ain’t broke, don’t fix it, right? There are more modern lubes and bio-lubes like FrogLube that do work very well, too, but they need to be heat-applied to get into the pores of the metal, and don’t work that well on wood. Grease goes well with most everything.

I break the guns down to a very basic level – I remove the stocks and magazine floorplates/triggerguards. I then liberally smear grease to the barrel/receiver channel in the stock, and I really try to push it into the pores of the wood so water won’t penetrate into it. Then the metal gets a light, but complete, covering of grease anywhere it’s hidden inside the stock. A tip: you will probably need to slightly re-adjust the sights of a rifle that has been pulled out of its stock, as the stock bedding is a key part of how a rifle shoots.

Grease on the inside of stock and on metal works in an 1895 Winchester.

Grease on the inside of stock and on metal works in an 1895 Winchester.

Grease applied inside the stock, and all internal metal parts on Winchester Model 54.

Grease applied inside the stock, and all internal metal parts on Winchester Model 54.

My thought is, anywhere I can’t get with an oily cloth after I come in from the weather should get greased up, so I don’t need to worry about it. I do NOT grease the bore unless it is going away for long-term storage. A very light coat of a high-quality gun oil (I like Hoppes Elite) goes on the bore, and on all exterior metal parts before the gun goes out to play and after I get back, to keep water out of the metal.

The upside to grease is no corrosion or rot; the downside is that in extremely cold temperatures, grease thickens substantially and will slow down moving components of the gun, such as hammers, springs, and firing pin travel, and could render your gun useless. If I know the temps will be dropping below freezing, I’ll break the gun down and limit the grease to non-moving parts, and the moving parts will get a dry graphite lube like Remington DriLube. I like my guns to go “Bang” when I pull the trigger.

Also, I don’t use grease on guns that will be used for extended firing sessions, such as high-capacity semi-autos. The grease will melt and either burn off or fly off/drip out from the gun once it really heats up, so I limit it to my hunting bolt, pump, and lever actions. For the high-heat guns, the aforementioned FrogLube, or Militec-1 is simply awesome: degrease the gun thoroughly, and use a heat gun or your oven to heat the works up to almost-too-hot-to-touch temps. Use a toothbrush to smear in the lube. Once every surface is covered, let the gun cool and wipe off any excesses. What happens is that when you heat the metal of the firearm, the pores of the metal open up. After you introduce the lube, the metal cools, trapping it inside the metal pores, where it will be released as the gun heats up, keeping the gun water-repellent and running slick.

And, for the opposite end, I keep a wrap of electrical tape over the bore of the rifle. This keeps moisture out, and when you pull the trigger, air and gases escaping past the bullet will blast through the tape before the bullet touches it, so you point of impact will not be harmed. Be sure to obtain scope covers for any optics, to keep water off the lenses.

Sand/grit/dust

The opposite extremes can be just as damaging. Being in a sandy, dusty environment like the Middle East will bog guns up just as fast as water. Dust and dirt will collect anywhere there is oil or grease, and then stay there. Eventually, this muddy, gritty works will keep your gun from functioning. Also, dirt in the bore can be catastrophic when you send a bullet under high pressures down it.

Luckily, if your conditions are dry and dusty, you don’t need to worry about rust as much as keeping the crud from building up. Here, we almost treat the gun like it’s going into very cold temps: use grease if you’d like on non-moving parts to keep dust and stuff from getting under and into your gun, and then a dry lube on any moving parts. I hear Froglube works well if you really be sure to wipe off excesses. I know that I’ve heard horror stories of troops in the middle east having their guns jammed up by crud that’s accumulated and attracted to the CLP they use. So just know what CAN lead up to your gun being disabled by dust and sand, and be prepared to dig out the toothbrush and keep things cleaned out more often. The tape over the bore will keep junk out in this instance too.

In case you can’t tell, I don’t really have any experience with overly dry conditions here, so I’m going on what research I’ve done and stories from guys deployed in situations like those. If you have any experience in those climates or other extremes, please speak up as to what works well for you so others can benefit from your experience as well. Much obliged!  – SHTFBlog.com

Stay safe! -TRW


The Top 6 Survival Rifles and Why You Need One

$
0
0

guns

By

Whether you are prepping for the zombie apocalypse or the aftermath of a hurricane, self-defense is an important aspect of surviving any disaster.  Everyone has their preference as to what qualifies as the best survival weapon. History has proven the rifle to be the best all-purpose firearm to face a variety of combat and self-defense scenarios.

However, a rifle should only be part of what many preppers refer to as a layered defense system.  It doesn’t matter if you are bugging out or sheltering, your need to arm yourself with a variety of weaponry, self-defense skills and training is the same.  With that said, if you could have only one firearm in a survival situation it should be a quality rifle.

Though handguns and shotguns are also to be considered, a rifle will give you the most versatility for handling a variety of post-disaster needs from hunting to perimeter security.  However, the options and varieties when it comes to choosing a survival rifle are nearly endless and even the most avid shooters and preppers struggle to choose a favorite.

Ultimately, the choice comes down to your own personal preferences and needs, as there is no such thing as the perfect survival rifle. Below we will feature a handful of rifles that are commonly considered to be among the best all-purpose firearms to have on hand when SHTF.

ar151. AR-15 – The AR-15, which is manufactured by dozens of individual companies and comes in a variety of styles, is one of the most widely used rifles in the world.  The semi-automatic AR-15 was designed by Armalite, who then sold the design to Colt in the early 1960s.  The updated fully-automatic Colt AR-15 became the standard infantry weapon of the US Military and has since become a favorite in military, law enforcement, and civilian communities alike.

The AR’s popularity comes from its accuracy, reliability, and nearly unlimited levels of customization thanks to its modular design and two-piece receiver.  The rifle is capable of firing either 5.56x44mm or .223 caliber rounds, typically delivered from a 30-round magazine.  Both Armalite and Colt still produce semi-automatic versions of the AR for civilian purchase, but other popular manufacturers include DPMS, Smith & Wesson, Remington, and Bushmaster.

One of the best start-up AR-15s for survival purposes is the DPMS Sportical, which will only set you back about $700.  It’s a lightweight and ready-to-shoot carbine-style AR with a 16-inch barrel and adjustable stock capable of firing either 5.56 or .223 rounds.  Like most ARs, it can be upgraded with an endless array of accessories to suit your post-disaster survival needs.

AK47_WOOD_82. AK-47 – Like the AR-15, the AK-47 is one of the most popular rifles in the world, and easily one of the most widely recognized.  The rifle has seen action all around the globe and is praised for its ability to withstand use and abuse in nearly any terrain, conditions, or combat scenario.  An AK-47 can be submerged in water or mud, go through a sandstorm, or fall off a cliff and still fire without fail.

That’s because unlike most modern-day tactical rifles, the 60-year old design of the AK employs loosely fitting moving parts that give it the ability to sustain abuse.  The tradeoff is relatively mediocre accuracy, but a 30-round magazine of 7.62x39mm rounds should be more than enough to hit your target in a survival standoff.  If not, the sheer intimidation of the gun’s appearance and rate of fire will be enough to send a clear message to your attacker not to mess with you.

Though AK-47 is commonly considered a “bad guy” gun, the stereotype attached to it in normal times may come as an advantage during a disaster.  Basic models can be purchased for about $500, also ammo is cheap and abundant.  AKs are great considerations for preppers on a budget who want to send a clear message to anyone who tries to harm them when SHTF.

aom1303. M1 Carbine – Though it hasn’t seen active duty in combat since Vietnam, the M1 Carbine was for years considered to be one of the best combat rifles in the world.  Designed as a more compact and lightweighted version of the M1 Garand, a WWII infantry staple, the M1 Carbine was an incredibly versatile rifle that had high effect and tremendous accuracy, especially at mid-range.

To that effect, the M1 Carbine still serves as a great all-purpose rifle.  The standard comes with a 15-round magazine of .30-caliber rounds, which aren’t the best for taking down targets at a distance, but serve their purpose at closer ranges and in hunting scenarios.

A modern take on the M1 Carbine, the AOM130, is available from Auto Ordinance for about $800.  The rifle, made in the USA at Kahr Arm’s Worcester, MA plant, weighs in at just 5.4-pounds and features an 18-inch barrel and traditional walnut stock.

Unfortunately, the original models from WWII and Korea are getting harder to come by, which is unfortunate given the fact that even the old ones are still battle-ready anytime.  However, .30-caliber ammo is becoming increasingly more expensive and harder to come across giving the M1 Carbine what is probably its only disadvantage as a modern-day survival rifle.

Ruger_10_22_Stocks4. Ruger 10/22 – Some preppers insist upon arming themselves with the latest and greatest tactical firearms with the most firepower.  Others believe basic is better and consider the .22-caliber Long Rifle (LR) to be the best and the only rifle you need to survive any disaster.  If you subscribe to the latter theory, there are few better options than the Ruger 10/22.

Like most quality .22 LRs, the Ruger 10/22 is the perfect rifle for those new to shooting and a great starter gun for children and young adult shooters.  The .22-caliber rimfire ammunition doesn’t deliver any kickback or recoil, but can hit targets at 100-yards with deadly precision and ease.  The carbine-style rifle comes in stock with a 10-round rotary magazine that sits flush with the stock of the gun, helping to give it a lower profile and more comfortable carry.

One of the biggest advantages of a .22-rimfire long rifle is the abundance and affordability of ammunition.  This will allow you to enjoy endless days of target shooting before SHTF and the opportunity to stockpile plenty of backup rounds to have on hand when disaster strikes.  Fortunately, ammo costs shouldn’t be much of a concern to begin with, as the gun itself will only set you back a couple hundred bucks. From there you can customize and accessorize your Ruger to suit your specific survival needs.

marlin_1895g_right_side_25. Marlin 1985 GS – If you want a compact rifle with big stopping power that will take down nearly any type of game in any kind of whether, look no further than the lever-action Marlin 1985 GS.  Despite the appearance of a menacing big-game hunter, which is indeed, the 1985 GS only measures 37-inches overall and weighs just 7-pounds.

At 18.5-inches, the barrel of the gun is only slightly larger than a carbine-style rifle, but the .45.70 Gov’t issued rounds over stopping power unlike most guns of its size.  Whether you’re up against a mob of angry looters, zombies, or a wild bear, the Marlin 1985 GS will have no problem mowing down anything in its path.

In addition to its sheer stopping power, the rifle classic employs a classic walnut and stainless steel design that’s both aesthetically pleasing and practical for battling against corrosion in rough weather.  The rifle starts at about $650, a reasonable price to pay for a rifle that’s guaranteed to put food on the table and stop enemies in their tracks when the going gets rough.

Henry-AR7-US-Survival-Rifle6. Henry Arms AR-7 – The term “survival rifle” was originally designated for those guns designed to be carried in the cockpits of military aircraft when a pilot was shot down in enemy territory.  The gun needed to be compact, lightweighted, and capable of taking down both wild game and enemy combatants with reliability and accuracy. To that tune, the US military adopted the Springfield Armory M6 Scout as their rifle of choice for aircraft pilots.  This collapsible gun featured two barrels that shot both .22 LR and .410 shotgun rounds giving it added versatility.

Though the Scout could still be considered a good survival rifle today, a more modern take on the survival rifle can be found in the form of the Henry Arms AR-7.  The AR-7 weighs a mere 3.5-pounds and measures just 16-5-inches when broken down, making it ideal for concealed carry in a bug out bag, vehicle, or even underneath your jacket.

The rifle comes with two 8-round magazines for chambering .22 LR ammunition, which is one of the best and most readily available all-purpose survival rounds.  The gun will only cost you about $280 and can serve as either your primary or backup survival rifle.

The rifles featured above by no means constitute a comprehensive list of the best all-purpose survival rifles.  There is a nearly unlimited array of options to choose from, each of which have their advocates and serve various needs in the military, law enforcement, hunting, and target shooting community. If you want to have the best chances of surviving a disaster scenario, you must equip yourself with a firearm that you feel comfortable shooting at both two-legged and four-legged targets to protect and provide for yourself.

The selections above were chosen for their popularity, versatility, affordability, and ability to be handled by shooters of all levels.  The choice comes down to you, but in the end the best survival rifle is the one you have with you, the one you have ammo for, and the one you’re trained to shoot effectively.

Find out more about SHTF defense on Buletproof Home.


Survival Tactics: Concealment Vs. Cover

$
0
0

Taking_Cover_Final

By Josh

If there is one area where Hollywood does a major disservice to self-defense, it is in the way it shows a firefight. Any material the hero or major villains decide to hide behind becomes invulnerable to bullets, whether it is a table, a car, or a wall in their home. The proper distinction between cover and concealment is lost on the part of the scriptwriters and action choreographers, and unfortunately as a result many preppers who watch their movies have some misconceptions too! If you were put in a position where you had to defend your home, food, and family from looters you wouldn’t want to rely on faulty TV tactics, so it is important to understand the real differences between cover and concealment.

What is the difference?

Concealment only hides you from the enemy. It doesn't protect you from gunfire if they do spot you.

Concealment only hides you from the enemy. It doesn’t protect you from gunfire if they do spot you.

The names can give you some clue. Concealment is primarily able to hide you from prying eyes, keeping you from being specifically targeted in a firefight. However, if you tried to use concealment to protect yourself from stray rounds, you would turn into a lead depository pretty quickly. Cover, on the other hand is sufficient to protect you from enemy rounds winging their way towards you. It might also conceal you, but generally that benefit is secondary to the bullet protection offered. Furthermore, different kinds of cover protect from different levels of damage. A small caliber pistol round that hits you from a long range requires far weaker cover than a rifle round from point-blank range will.

The other key difference, and the one that most people tend to forget, is in how common they are. Concealment is almost constantly available in varying degrees, as every wall, piece of furniture, and tree could potentially hide you from the enemy. Obviously some means of concealment (such as a carefully designed ghillie suit) are better than others, but on the whole concealment is almost always at hand.

Cover protects you from bullets, and can also double as concealment in many cases.

Cover protects you from bullets, and can also double as concealment in many cases.

Cover by contrast is rather rare in most settings. Most furniture, walls, cars and smaller trees are not sufficient cover for even small caliber rounds, and so diving behind them in a firefight would serve only to conceal your position rather than protecting it. To be very clear, this includes metal tables and even small vehicle engines depending on the round despite what a thousand TV shows and movies may have shown you.

In most homes, cover is almost nonexistent unless there are concrete walls in a basement or a steel door to hide behind. Outside, unless you live in a city or town which has buildings with thick concrete/brick walls or other solid structures, your best bet will be to prepare earthen defenses like a foxhole, preferably surrounded by sandbags as additional protection.

Common types of concealment and cover that you’re likely to come across in a disaster

In order to further help you to tell the difference between these two concepts, here is are lists of the common kinds of concealment and cover that you’re likely to come across. If you’re having trouble shaking off the preconceived notions that endless TV firefights have given you, these may prove particularly helpful. Note that many items that qualify as cover also function as concealment, but for clarity the items on the concealment list only hide, not protect.

Concealment

  • Tree limbs, leaves etc.
  • Bushes and brush, including tall grass.
  • Shadows and blinding light (if positioned so that the enemy has to stare into a floodlight or the sun in order to look at you).
  • Opaque curtains.
  • Drywall, wood, and other thin material walls.
  • Piled clothes, blankets, leaves, and other materials.
  • Small (under 2ft in diameter) trees.
  • Vehicles, excepting reinforced doors on squadcars and particularly large engine blocks.
  • Tables, desks, doors (excepting thick steel doors).
  • Ghillie Suit.
  • Window blinds and shutters.
  • Smoke
  • A corpse (even a particularly fat person will not stop most rounds)

Cover

  • Thick stone, brick, or concrete walls/buildings.
  • Large engine blocks.
  • Thick (over 2ft in diameter) trees and stumps.
  • Natural valleys, hills, holes, and craters from explosions.
  • Earthwork defenses, including several rows of sandbags.
  • A safe.
  • A steel door.
  • Piled rubble.
  • Concrete walls in a basement.
  • A freezer or refrigerator, assuming it is packed with food.

Make sure you know the difference between cover and concealment: it might just save your life in an emergency. – Prepared For That

Your Thoughts?

Let us know what you think in the comments below. Can you think of any other common types of cover or concealment?


What We Want is What You Got: Defending Your Life From the People Who Will Stop At Nothing

$
0
0

What We Want is What You Got: Defending Your Life From the People Who Will Stop At Nothing

By P. Henry

One of the concerns of anyone who is preparing for a SHTF scenario if you are being honest is the dark side of human nature. You can have all of the supplies you ever need; you could have a fully stocked pantry with enough food to feed your family for 10 years, enough ammo to conduct a 21 gun salute every minute of the day for the next 5 years and it could all be taken from you in a minute by desperate individuals who care nothing for you or your family. When hard times come, the true survival instinct kicks in at some point and that is when some of the biggest evils happen and you might find yourself defending your life. When it is desperate and it’s either you or them, most people will side with themselves and do whatever is necessary to take anything you have if what you have can help them.

We discussed the concept of Marauders in a couple of posts here on the Prepper Journal and while I think the shining example of an idiot used in Doomsday Preppers was not something I would be overly concerned with (the person, not the scenario) the threat itself is very real. That is one of the reasons we talk about security for your home, maintaining an active Situational Awareness and how society can break down when there is no rule of law. History is full of too many examples of good people being killed for senseless reasons, and ignoring the very real threat that this could happen to you isn’t going to make it go away.

One of our readers is from Australia and they commented on a post I wrote a while back about the top 5 guns you need to get your hands on. The comment was essentially, that since there are no guns in Australia, this person has nothing to worry about and I don’t believe that is true. If you have no guns, you have even less of a chance of protecting yourself from bad guys that do, but lets assume for a second that Australia really had no guns whatsoever. Do you really believe that the absence of firearms is going to guarantee your safety? Tell that to the people in Nigeria who were killed with Machetes. A lack of guns doesn’t mean everything is peace, love and singing. This isn’t new and it violence won’t stop no matter what law you pass or what right you take away from people. If someone wants you dead bad enough, you are dead. That is unless you can stop them.

Guns aren't the only way to kill a person.
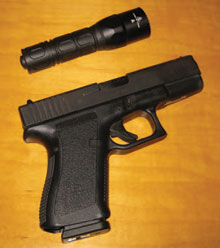
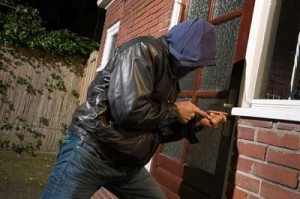
Now, that is one problem, not having some means of protection, but the bigger problem is that dark and sinister element I talked about in the first paragraph. No matter what happens, if society devolves to the point of desperation people will do desperate things. There will not be any negotiating with someone who is starving if they have a plan, superior numbers and firepower. There will be people coming to take what you have and you will be lucky if this happens that nothing worse than theft occurs.

I saw this YouTube movie last year I think and again recently on another blog I visit, but it has always struck a chord with me. Yes, some of the graphics are a little cheesy, but for a video it isn’t bad at all. Actually, I think it does a really excellent job of painting a hypothetical scenario that a lot of Preppers could be faced with. You have saved, planed and prepared and it could all be taken from you by people who didn’t prepare. Your family could be stolen by criminals who have planned to take what you have because it is what they want.

No amount of planning can prevent people out there from trying to steal what they need in order to live. You can plan all of the charity in the world, but eventually it will come down to what you need to feed your family. The line will be drawn somewhere, maybe your stocked, solar-powered retreat that they want. If you have anything at all you will be a target for people like this. I invite you to watch this short presentation and imagine your family after the grid goes down. Imagine people like this watching your home from the woods. Will this change how you prep? If you know that these predators are out there, would that change anything you are doing now? – The Prepper Journal


The Problem with Prepping

$
0
0

BlastDoors

By

Don’t Fool Yourself into Thinking You Have Nothing to Worry About

Preppers can fairly quickly find themselves at the mercy of our own minds. We create the need and the solution in our lives by analyzing threats and weighing the likelihood of various disasters – natural and man-made and then craft plans for how we will deal with those disasters when they come. The problem comes when we analyze the disasters and settle upon a strategy that we think will either protect us completely or mitigate all of the undesirable effects of that crisis we are planning for. This is an issue that I think a lot of Preppers face and ignoring it can get you in just as much trouble as someone who has never prepped before. You might meet the same fate, just at different times. The problem with Prepping is that you can never be finished.

I thought about this as I was compiling my latest list of items that I either needed to acquire or wanted to sort out in my life. I even started to draw small boxes to the left of the items on my list so that when I had finished the various elements of my survival checklist, I could mark each box as complete. A fully completed list meant that I was done, right? That I would never have to worry about any of these particular issues again is how some people choose to look at making lists.

All I need is 6 months’ worth of food

So the grid goes down like it did in American Blackout and you are locked up snug as a bug in a rug inside your house. The power has been off for a week so far, but you have that covered. You also had 6 months of food inside your pantry so you should be all set, right? Wrong… If the power never comes back on or we descend into something worse, what happens when your food runs out? What if your brother from the next state rolls into town and starts to eat your food too?

Having a stocked pantry doesn’t mean you will live forever. In order to be truly prepared, you have to be able to feed yourself forever. Does that look like starting a vegetable garden or getting started with small livestock like raising chickens? What about Aquaponics? The process of feeding yourself and your family never stops until you die.

The idea here is that you can’t go out and buy a whole pallet of freeze-dried emergency foods and expect that you are finished. Having a great supply of food so that you can outlast most any temporary crisis can give you a huge leg up, but is not a magic bullet.

I just need an awesome Survival arsenal and I can handle anyone

I own guns and I have written several articles about various aspects of gun ownership like “The Best Gun for Home Defense” and “How to Select the Best Handgun” and another about what I consider our “Obligation to Carry Concealed“. We talk about storing ammo and the different calibers you need for different aspects of security and survival but simply having a lot of guns does not mean you will be safe.

Guns are an important part of my survival plans, but simply having one strapped to my side doesn’t or should not give me a false sense of security. This is a tool and that is all. With a firearm I will have the opportunity to react in ways that I otherwise wouldn’t. This isn’t an invisible shield against violence; it won’t protect me from dedicated bad guys or the stupid actions I may take myself. There is so much more to security than simply having a bang stick and we are all wise to temper our bravado in the face of disaster just because we bought a gun. This can go the same way for bad guys too who get cocky when they have a firearm. Just because you have a gun that doesn’t mean someone can’t walk up behind you and put their own bullet in the back of your skull.

I have backup generator

A generator is another one of those great tools we talk about often and I have one. Does that mean I will have power for the rest of my life? Nope. Actually, I would be really happy with 500 hours of run time out of the generator. I have plenty of fuel stored up and oil, but mechanical things break eventually. If you don’t have spare parts or more importantly the know-how to fix a generator, you have to look at this as a finite resource.

A backup power plan is excellent and I have one myself with further plans for solar backup, but this isn’t something I can count on to completely replace all of the power we have grown used to. Even if it was, in a complete grid-down scenario people would know that you have power unless this was hyper secret. Small chance of that with a generator but eventually everyone will know you have power and then we get back to that survival arsenal we spoke about earlier.

I have a hidden survival retreat

A well-stocked retreat somewhere deep in the woods is the Holy Grail of Prepping Legend and Lore. Seriously, I covet those who have the resources to purchase a retreat property with all of their gear pre-staged in place even more those that are able to live at their retreat year-round. Even if you do have a compound with electric fence, intrusion detection, mines, roving guard dogs, sentries in the watch towers on Barrett 50 cal rifles, that still does not guarantee you will ever live in peace the rest of your life.

That is one helluva head start though!

My point is that nowhere and no situation will stay completely safe forever. Are you possibly months, or years away from worrying about the same thing people in New York will be faced with? Perhaps, but to think you will stay hidden away forever without any other single living person coming across your path is far-fetched in my opinion. If you have this retreat, you will still have to guard against others who find out about what you have and want to separate you from your castle.

I have a Bug Out Vehicle

Great! So what? A bug out vehicle is only as good as where it can get you. If you are stranded in the city because you didn’t get out in time, what good is that vehicle? If it is parked on the highway in traffic what does that do to your plans?

Having a bug out vehicle is important; especially if you need to get to your survival retreat up above but simply having a tricked out Ford F250 running diesel or bio-fuel doesn’t mean that you can’t be stopped. Having that big truck doesn’t guarantee you won’t have some type of mechanical failure or be disabled by someone else in a big truck.

OK, so what good is prepping then?

My whole point with this article is that you can’t become complacent. My list that I was filling out was for the day, not eternity. If I buy some extra food today, that is like a deposit in the extra time bank. By having supplies I am buying myself and my family extra time, but I can’t teleport us out of any emergency that appears with freeze dried food. I can’t change the fact that the electric grid is wiped out (as an example) just because I have 500 gallons of water stored.

I have said it before and I’ll say it again. Prepping is a Journey, not a destination. You will never be completely prepared for anything. You can only work at being more prepared than you were. You can strive for being better prepared than you were a year ago. What you can’t do is think that you are done and that you can sit back and relax. Prepping is done by people who see trouble ahead and take steps to deal with that trouble. Chances are, that trouble isn’t going to go away and neither should your dedication to staying ready and striving for more self-sufficiency and resilience. You very likely will never be as prepared as you want to be, but that journey will pay you back when the time comes. – The Prepper Journal


Viewing all 38 articles
Browse latest View live


Latest Images